
What's new: Changelog
See the changelog here.
1) Setting up your web app/website/HTML files
Option A) Use a URL for accessing your web application (= store files online)
Create a mobile-optimized website, for example, using jQuery Mobile and upload your site to your webserver/webspace. WebViewGold supports all kinds of web apps/websites (including HTML, PHP, WordPress, Progressive Web Apps, HTML 5 Games, WiX, apprat.io, bubble.io, …). Please make sure to optimize your website to feel like an app. By default, WebViewGold for iOS permits both HTTPS content and HTTP content. However, if you prefer to enhance app security by enabling only HTTPS content, there's an option to modify this setting (and/or consider 'blockfaultyandselfsignedhttpscerts' option). Please consider a professional User Experience/UX Review on UXreviewer.io or similar services for best App Store approval results. Such a UX review also helps you to achieve better customer retention in general for your product with suggestions for improvement.
Option B) Use a local HTML folder for accessing your web application (= store files within the app)
WebViewGold supports web apps bases on local HTML folders, too: Set uselocalhtmlfolder to true (see next step) and copy your HTML/CSS/JavaScript files (including subdirectories) to the "local-www" folder in your Xcode project. To do this, make sure to:
- Delete the default files in the "local-www" folder by selecting them in the Xcode file hierarchy, then right-click to press "Delete", then press "Move to Trash".
- Select all the files for your local website, then drag and drop them into the Xcode file hierarchy under the "local-www" folder. Make sure "Create folder references" is checked and press "Finish".
Option C) Use an HTML folder if the user is offline, and use a remote URL if the user is online (= store files online + store backup/fallback files within the app)
Copy your HTML/CSS/JavaScript files (including subdirectories) to the "local-www" folder in your Xcode project. To do this, make sure to:
- Delete the default files in the "local-www" folder by selecting them in the Xcode file hierarchy, then right-click to press "Delete", then press "Move to Trash".
- Select all the files for your local website, then drag and drop them into the Xcode file hierarchy under the "local-www" folder. Make sure "Create folder references" is checked and press "Finish".
2) Setting up WebViewGold for iOS
Download the WebViewGold app template for iOS here.

After downloading the .zip file of WebViewGold from CodeCanyon, there are three setup options for Xcode. Which setup option should be taken is determined by the kind of Mac system you might (or might not) own:
a) You use no Mac system:
If you do not own a Mac for running the required Xcode app, check out MacInCloud as it allows you to rent a virtual Mac online (we are not affiliated with the provider of that service). Using that service, you can build your iOS apps based on WebViewGold, even without using a Mac.
OR
b) You use a Mac system with an Intel chip (detect your chip type):
Download and install the Xcode app from the Mac App Store.
OR
Download and install the Xcode app from the Mac App Store. Then follow these steps to run your app using Rosetta:
(Rosetta is a software translation tool which makes the app compatible with the Apple Silicon chip)
- If you are using Xcode 14.3 and above:
- Make sure that you are using MacOS Ventura or above.
- Open Xcode. Then in the menu bar, go to Product > Destination > Destination Architectures and select "Show All Destinations".
- This will allow you to run and test your app on Rosetta simulators that are compatible with the app.
- If you are using older Xcode versions (14.2 and below):
- If you are using MacOS Ventura (or above), make sure to upgrade to Xcode 14.3 (or above), or your app will not work.
- If you want to test your app on iOS 16.4 and above, make sure to upgrade to MacOS Ventura (or above) and Xcode 14.3 (or above).
- Search for the Xcode application in your Applications folder.
- Select the Xcode icon, and then press Command (CMD) + I (or right-click/use the File menu and select Get Info).
- In the newly opened window, check the “Open using Rosetta” checkbox and close the window.
- This will ensure that Xcode always opens with Rosetta.
That's it, Xcode is ready for WebViewGold!
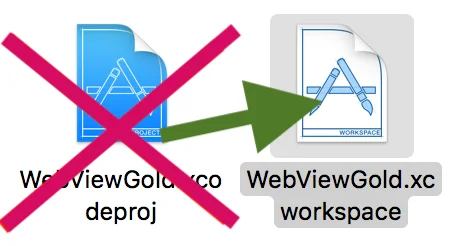
If you’re already running Xcode, please completely quit it (Command/CMD + Q). Then, please open WebViewGold.xcworkspace (instead of WebView.xcodeproj):
Within Xcode, open Config.swift and you will see a document like this:
Here you can set up your app easily. Setting up apps with WebViewGold is very easy and does not require any coding knowledge. Please don't forget to add your Envato/CodeCanyon Purchase Code in the purchasecode field for each app published by you. One license per each customized end product is required. License info of your CodeCanyon purchase: https://codecanyon.net/licenses/standard
Please take a look at this overview of all built-in configuration options:
3) Change App Name, Icon, and Splash Screen
It is easy to change the displayed app name.
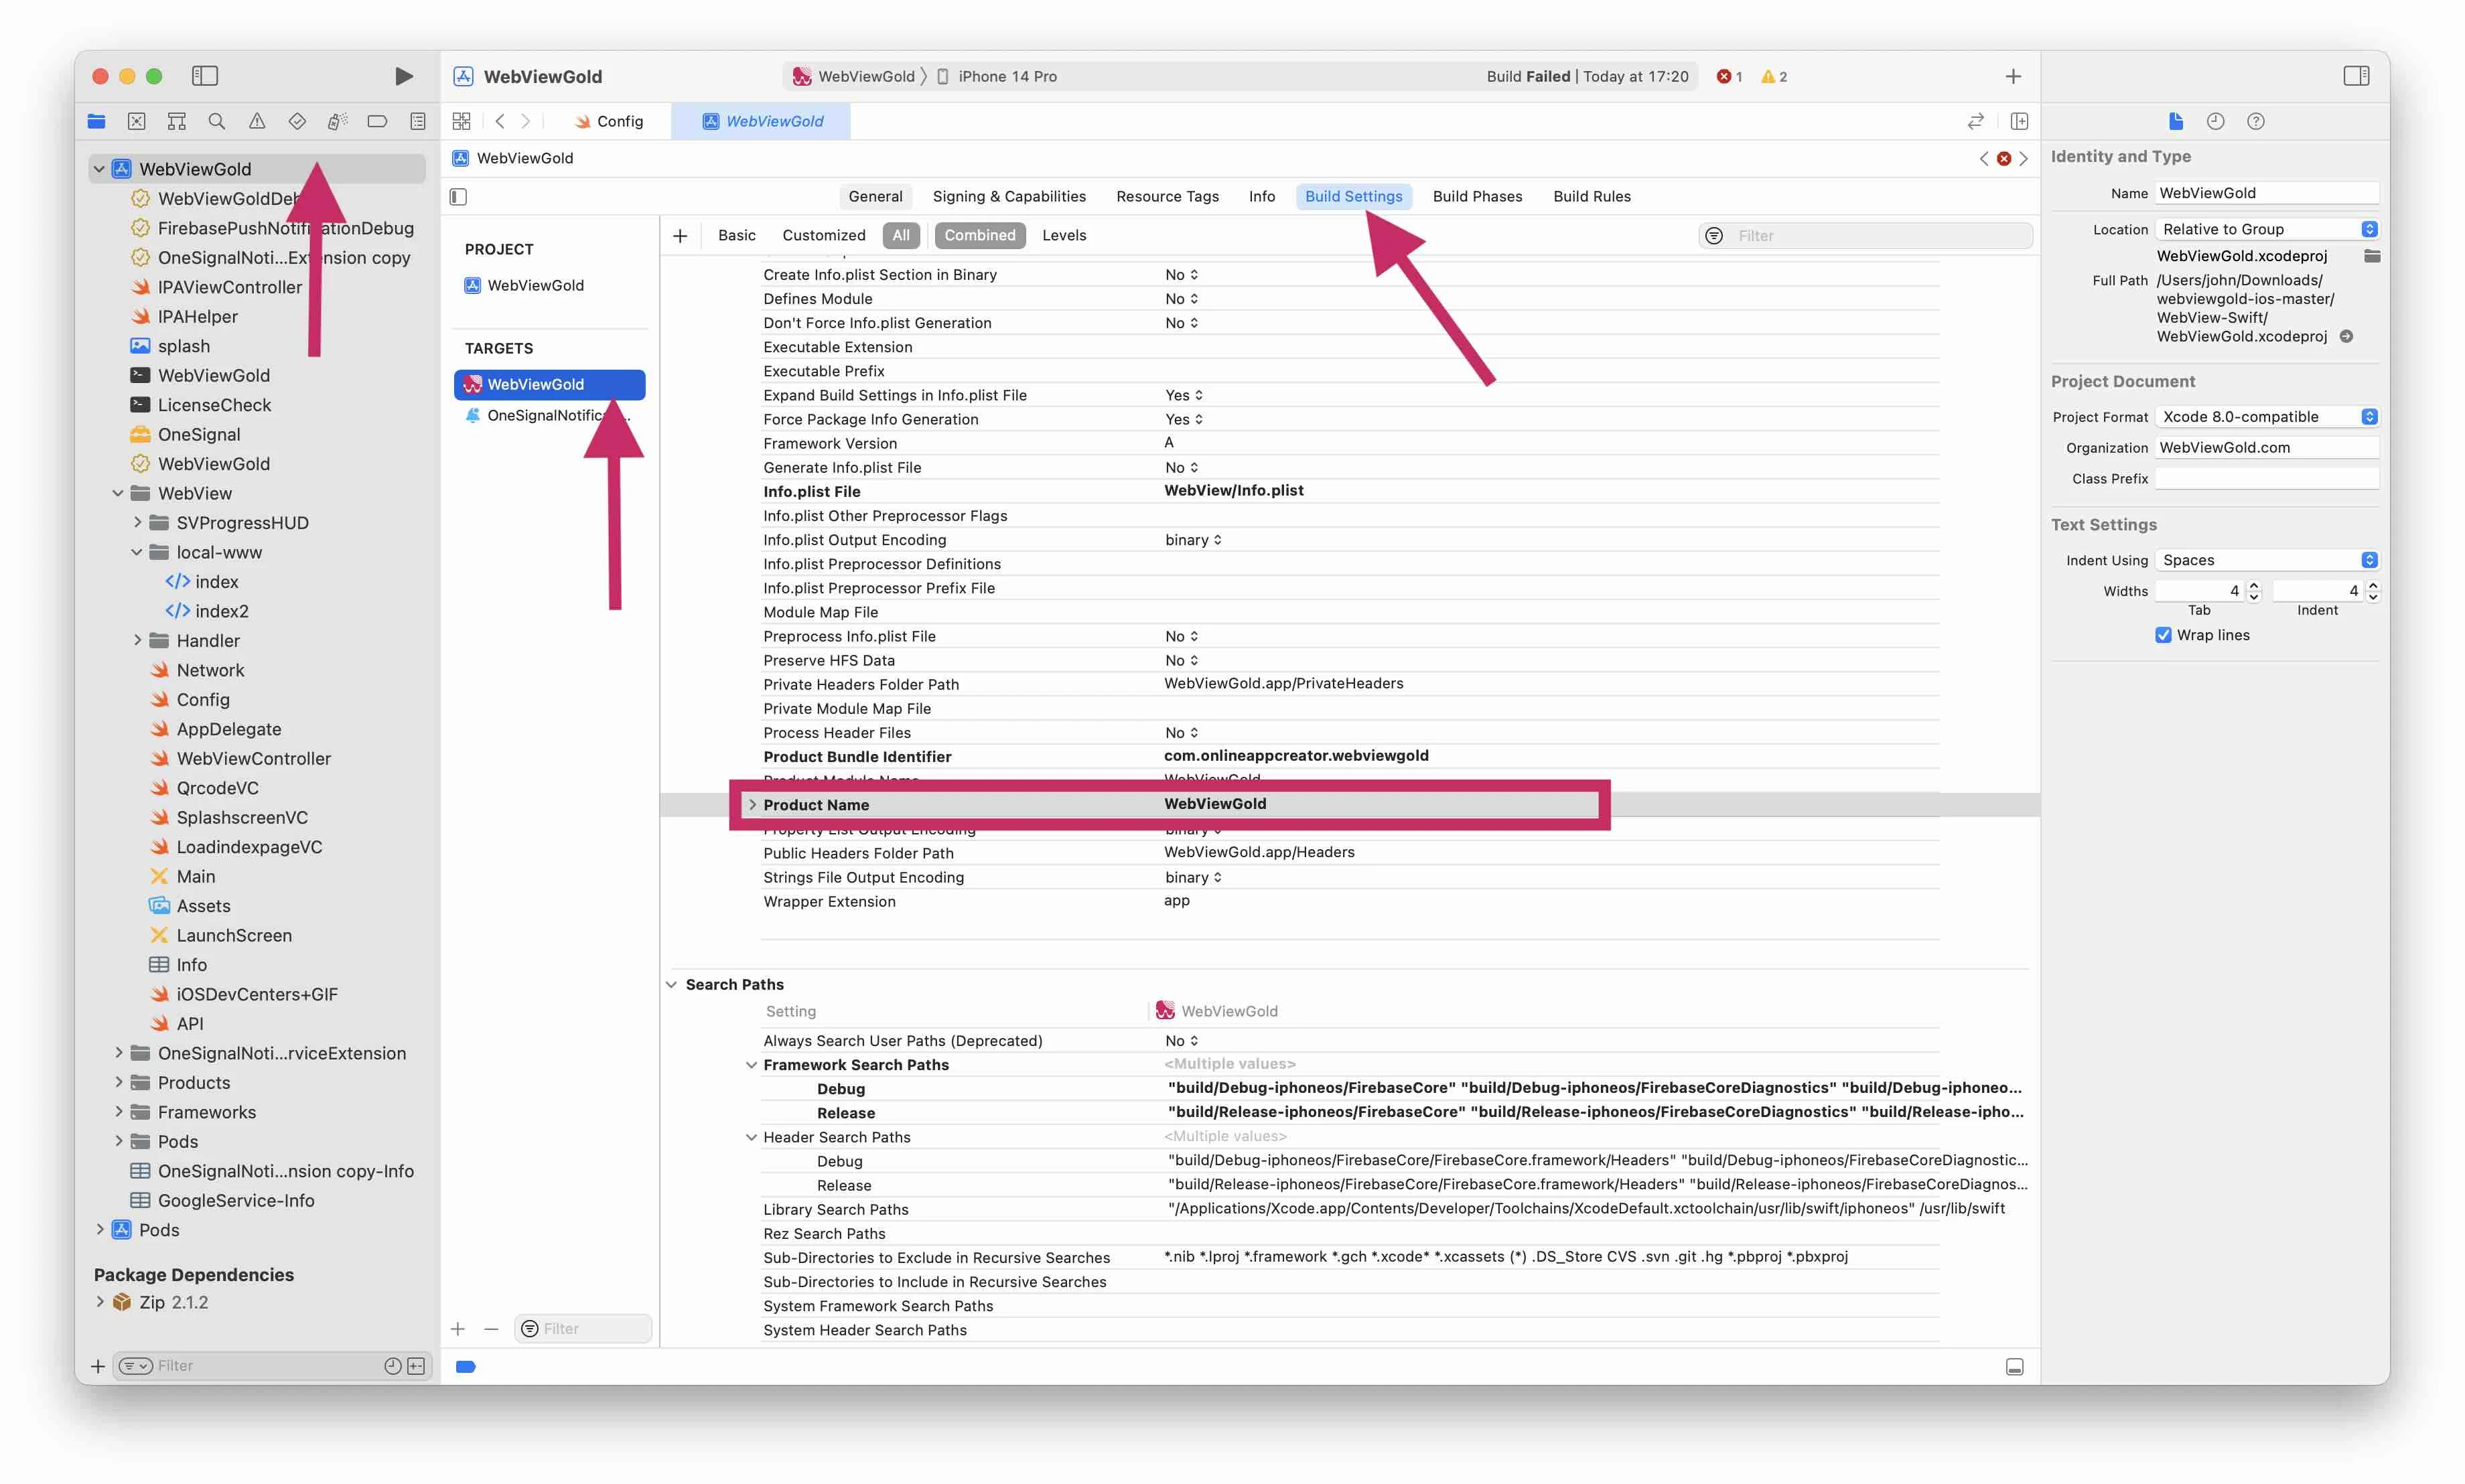
Navigate as shown in the screenshot via WebViewGold → WebViewGold → Build Settings to Product Name and change the name as shown:
NOTE: If your app name contains accent letters (like 'à', for example), you will need to replace them with normal letters for the Product Name. The Product Name is also used for naming files in your app, so it does not support accent letters (the app will crash). Then, to ensure that your app displays the correct name to users on the iOS homescreen, please also change the Bundle Display Name (located in the Info.plist file) from "$PRODUCT_NAME" to your app name with accent letters. For example, if your app name is "WebViewGoldà", the Product Name should be "WebViewGolda" and the Bundle Display Name should be "WebViewGoldà".
Afterward, include your app icon. A beautiful app icon is a perfect first impression for your customers. It's easy to add your app icon to your WebViewGold project:
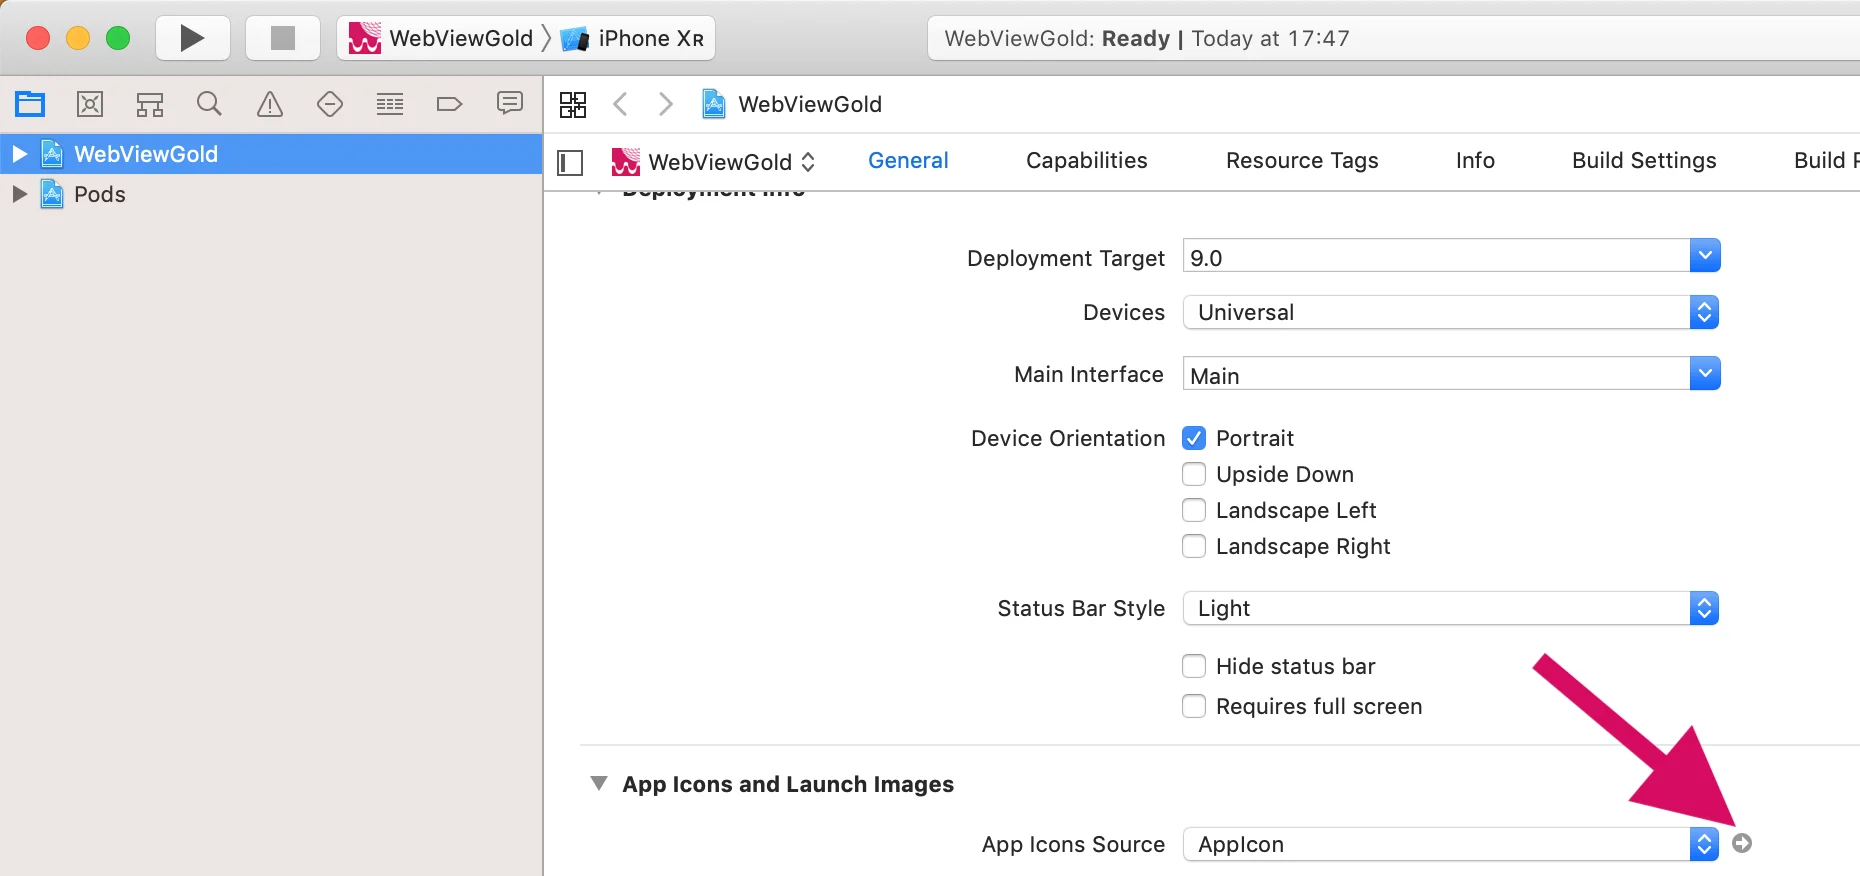
Just replace the included image files with your own resized image files. There are free tools online to help generate these different image sizes like App Icon Generator, for example (we are not affiliated with the developer company). You can search for any "iOS App Icon Generator" tool you like.
Splash Screen: Would you like to make your app more attractive to your customers and display your branding as a welcome image? Sure, add your individual splash screen graphics. Just replace the splash.gif file in the main folder of the Xcode project. Make sure to use GIF format (animated or static). You can use any GIF image resolution as long the width dimension equals the height dimension (e.g., 128px*128px, 512px*512px, or 1024px*1024px). Make sure that you use a proper GIF generator tool to create your GIF (do not just change the file extension name to '.gif' as it can cause issues). If you like, you can find free GIF generator tools online by searching for "free GIF generator".
Set the remainSplashOption option (can be found in Config.swift file) to true if you want to display the Splash Screen until your page was loaded successfully. Otherwise, it will be displayed for a short time only, and the native iOS loading indicator will begin.
Use the splashscreencolor option (can be found in Config.swift file) to modify the background color of the splash screen. Color options can be found here.
Modify Safe Area of Devices with a Home Bar
The jump from iPhone 8 to iPhone X and beyond changed a lot in terms of User Interface in the mobile industry by removing the Home button and introducing the Home bar. Depending on your web app design, the lower menu bar may be positioned incorrectly on devices (overlapping content) with the Home bar due to the change in the default safe area.
The good news is that WebViewGold has a feature that allows you to turn on a bottombar and choose its color to match your app theme. Since the issue of the Home bar overlapping app content may not appear in iPads (due to the larger screen and possible different layout), there is also an option to disable the feature in iPads. To implement this feature, use the following variables in Config.swift under the heading "Custom Bottom Bar Design". Make sure to set bottombar to true.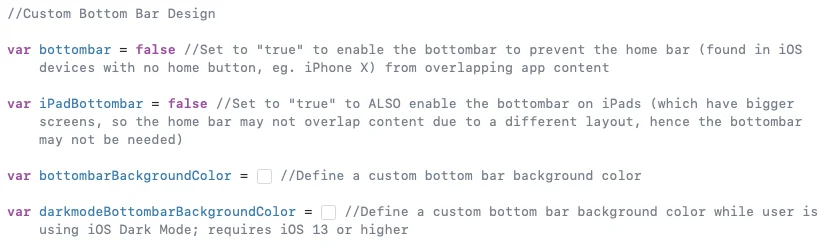
Advanced: Instead of using the bottombar feature, you can search for this code snippet part (CMD+F) in WebViewController.swift file where you can change the border value 20 to any desired value like 10, 30, etc: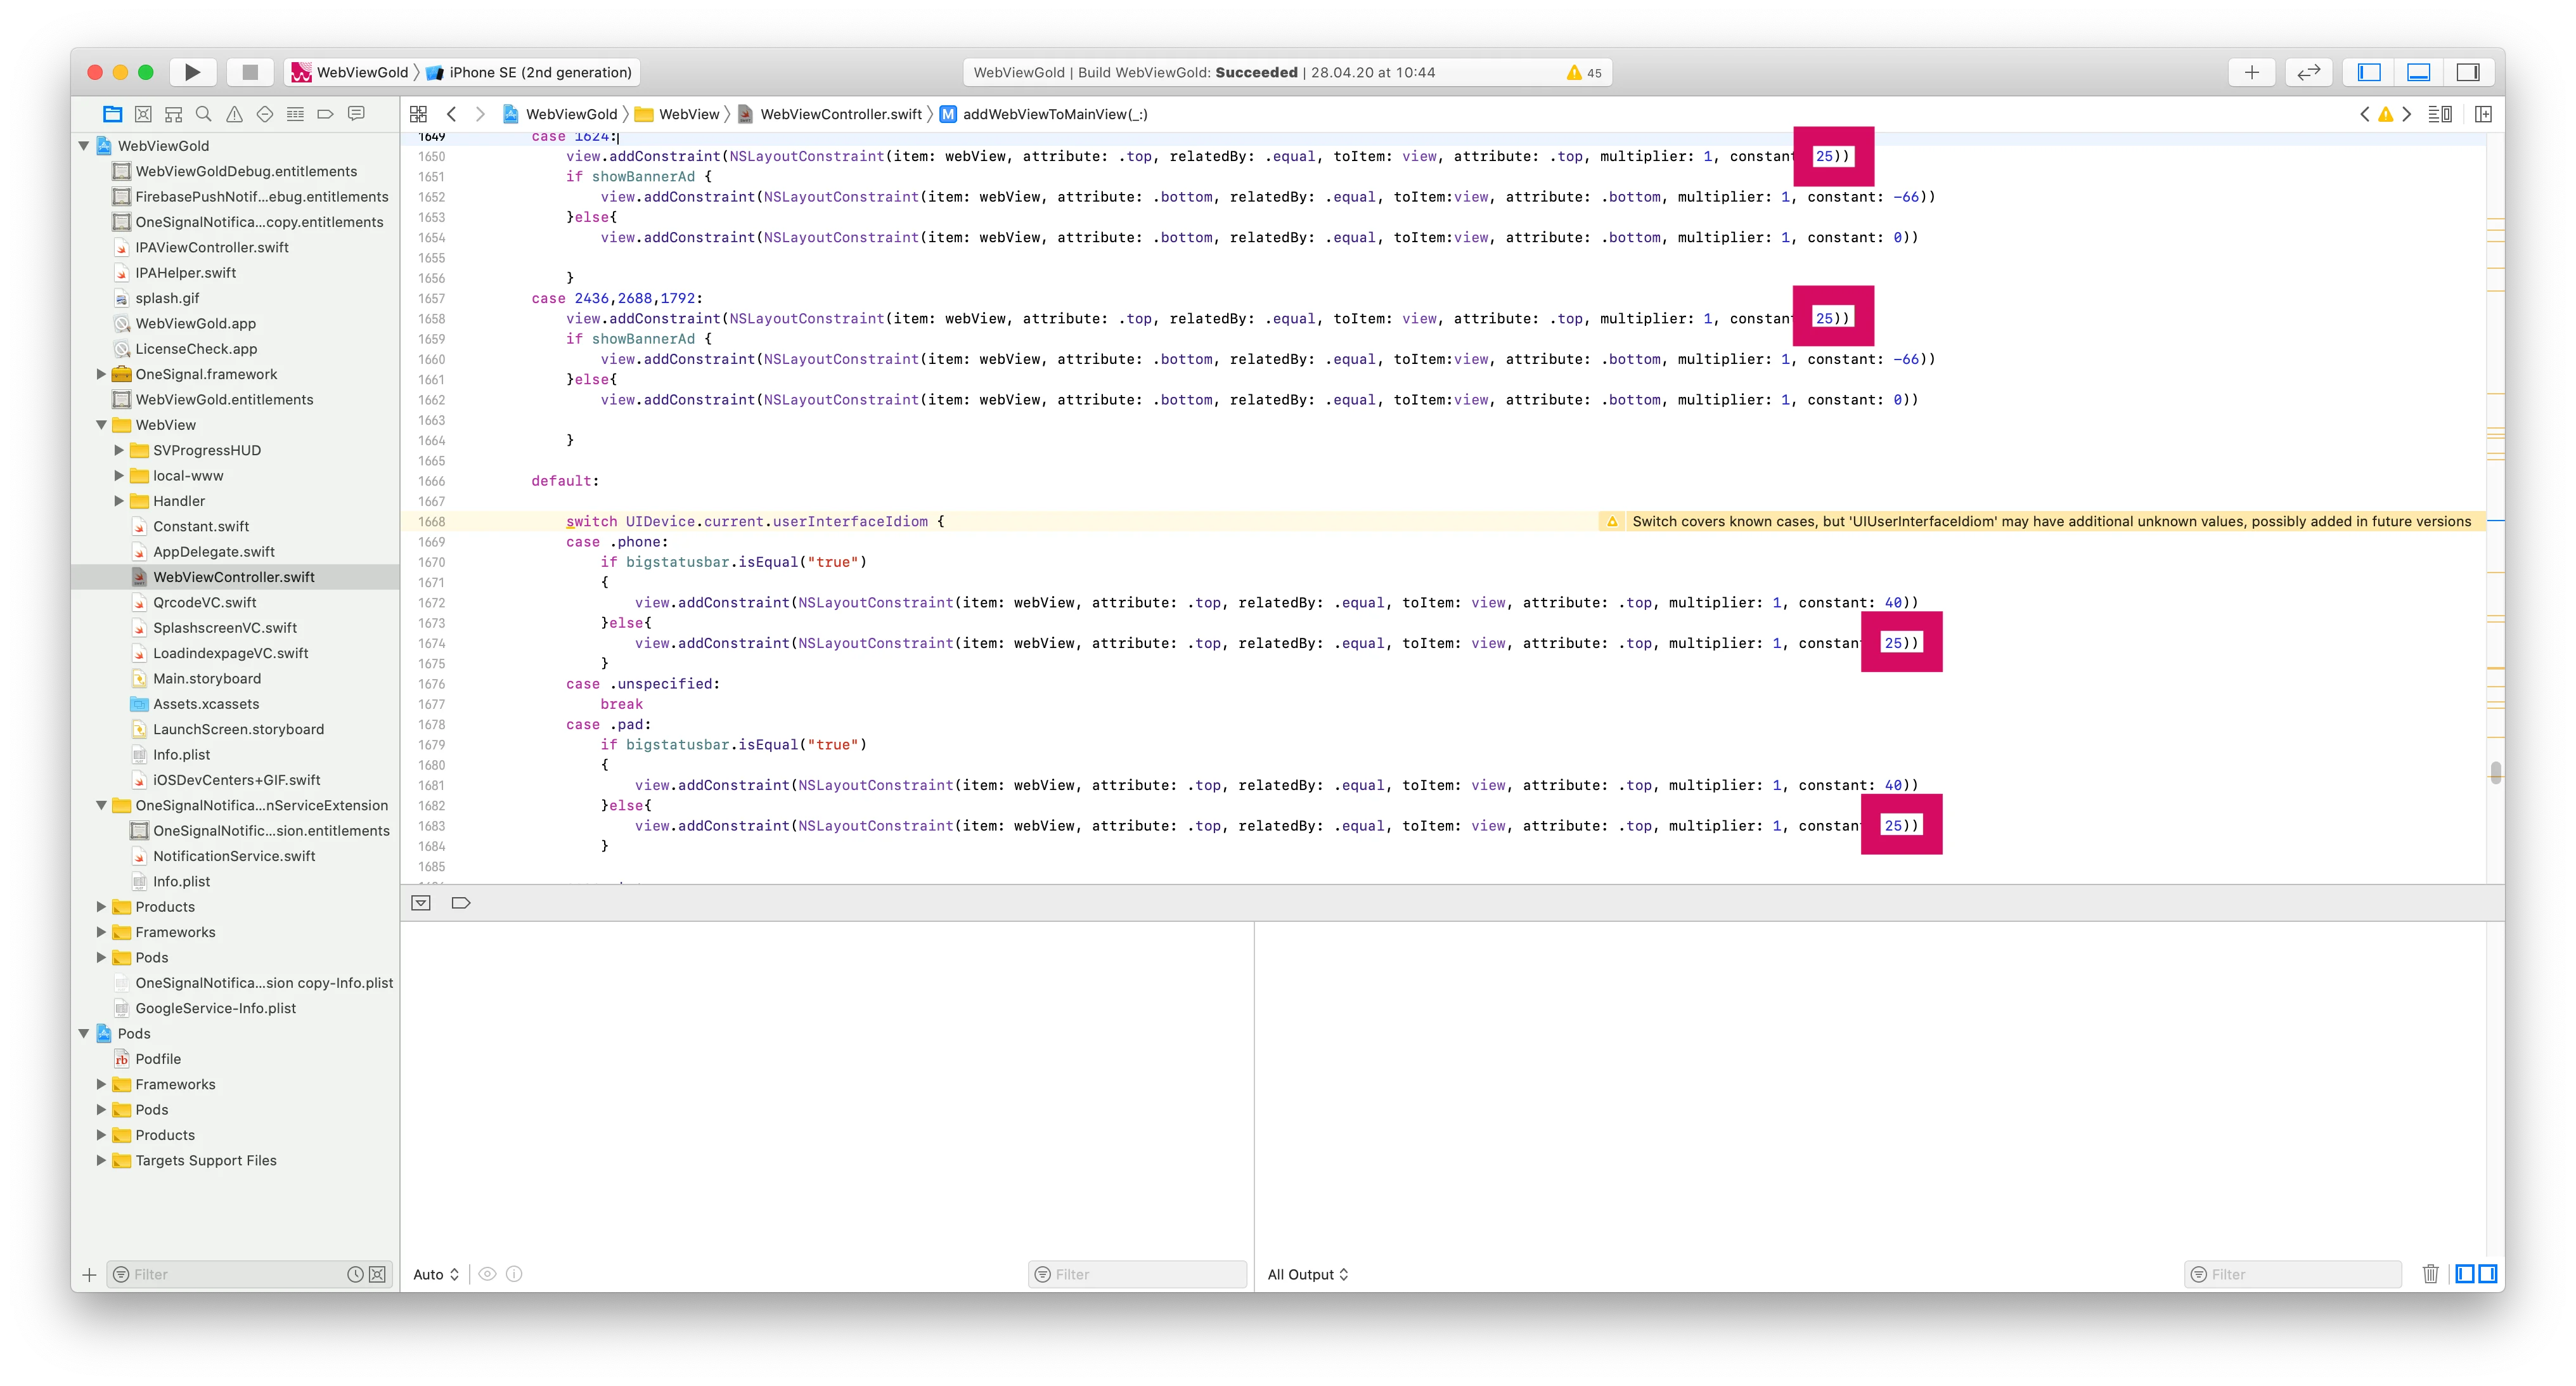
HTML5 Geolocation API
The HTML5 Geolocation feature enables users to communicate their own position to a web application. Check out the Mozilla guide on how to implement geolocation into your website or web app. In WebViewGold, the HTML5 Geolocation API will work by default after you integrated it into your web content. Since iOS 10, Geolocation is available for https-sites only, so please make sure to use a web app URL starting with https:// instead of http:// when using location requests. Demo: https://www.w3schools.com/html/html5_geolocation.asp
Push Notifications API via OneSignal, Firebase, and JavaScript
Push notifications are notifications that appear on your smartphone without opening the app. These types of messages allow fantastic interaction with customers and users of the app. Your app does not have to be open to receiving these kinds of notifications. This way, your customers do not miss any important news or messages. Push Notifications are suitable for many cases, e.g., for updates to orders, live tickers, or social media community. There must be an internet connection to allow app users to receive push messages. WebViewGold supports multiple ways of reaching your users via push notifications. If you do NOT want to use push notifications at all, open Config.swift and set askforpushpermissionatfirstrun to false in order to prevent asking the app user for notification permission.
Option 1: Use Local Push Notification JavaScript API
You can insert a piece of code (JavaScript) in your website, to define a push notification, which can be shown after your app was closed (while scheduling it during the app is open). This works without OneSignal configuration at all.
  <script>
  var title = "Your cart is waiting!"; //notification title
  var message = "You have left a cart full of dreams and deals behind. Dont leave it feeling abandoned"; //notification message
  var seconds = 120; //seconds from now on
  var url = "https://myshop.org/cart.php"; //deep-linking URL

  window.location.href = "sendlocalpushmsg://push.send?s="+ seconds +"=msg!"+ message +"&!#"+ title +"&!#"+ url +"";
  </script>
It could be used for different situations (countdowns, happy hours, specific reminders, ...).
To cancel all scheduled local push notifications run:
  <script>
  window.location.href = "sendlocalpushmsg://push.send.cancel";
  </script>
Option 2: Use OneSignal Remote Push Notifications
If you want to use OneSignal in your app, activate these options in Config.swift (by switching the values from false to true) and make sure to also replace the placeholder oneSignalID with your own.

Now Generate an iOS Push Certificate and import it:

Yay, you are done. You can send push notifications now:

If you want to use OneSignal URL Deeplinking (opens a specific URL when clicking on your notification), please add the desired URL with a custom field called url: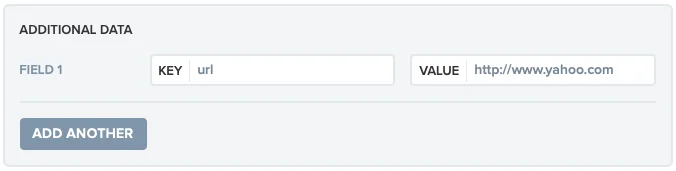
On the OneSignal.com Backend, you can fill in this key-value-pair window after clicking on "Advanced settings". Using the OneSignal API, you can add the "url" field to the API request (https://documentation.onesignal.com/docs/onesignal-api).
Do you want to get each individual user ID on your server for further processing and individual user push messages? Just activate the kPushEnhanceUrl option in Config.swift (by switching the value from false to true) in order to append ?onesignal_push_id=XYZ to your WebView URL. If your WebView URL is https://www.example.org, WebViewGold will call https://www.example.org?onesignal_push_id=XYZ instead. Only the first URL request will get that GET variable, so please save it in a session or in a cookie to access it on your linked pages. An alternative or additional way would be to retrieve & process the information on any page via JavaScript:
<script>
window.location.href = "getonesignalplayerid://";
alert(onesignalplayerid);
</script>
Option 3: Use Firebase Remote Push Notifications
Step 1: Create a Firebase Project
Begin by creating a Firebase project in your Firebase Console. This is a prerequisite for integrating Firebase with your WebViewGold app.
Step 2: Register Your App with Firebase
Once your Firebase project is ready, you can add your WebViewGold app to it by following these steps:
a. Navigate to the project overview page in your Firebase console, then select the iOS icon to start the app registration process.
b. To add a new app to your project, click Add app and select the platform options. When prompted, enter your app's bundle ID into the iOS bundle ID field. This ID is crucial and can be found by:
- Opening your app project in Xcode.
- Selecting the project name at the top of the navigator to access the General tab.
- Your app's bundle ID is listed under the Bundle Identifier field (e.g., com.onlineappcreator.webviewgold).
Ensure you input the exact bundle ID used by your app. This value is permanent once your app is registered with Firebase.
c. Complete the setup by providing the required app information, including:
- App Nickname: A convenience identifier for your reference in the Firebase console.
- App Store ID: Necessary for Firebase Dynamic Links and Google Analytics integration. You can add this later if your app doesn't have one yet.
Step 3: Register Your App
Click Register app to complete the registration process.
Step 4: Download GoogleService-Info.plist
Download this configuration file and replace the placeholder in your WebViewGold project with the downloaded GoogleService-Info.plist file.
Step 5: Activate Firebase in WebViewGold
In the Config.swift file, set the kFirebasePushEnabled variable to true to enable Firebase functionalities.
Step 6: Set Up APN and Sign Your App
Generate an APN key for Firebase, upload it, and then sign your app using the Firebase provisioning profile. For a detailed guide, visit Firebase documentation on iOS certificates.
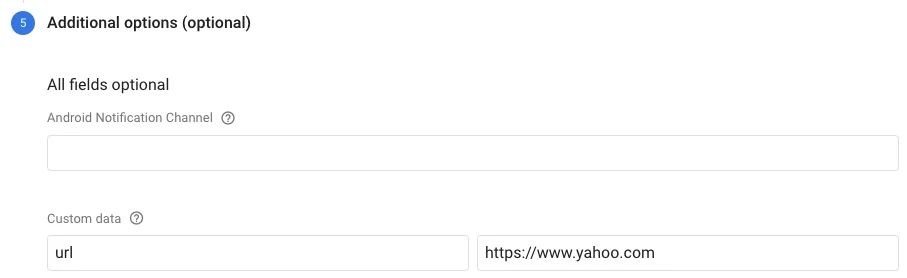
Step 7: Implement URL Deeplinking (Optional)
For Firebase URL Deeplinking support, add the target URL in a Custom Data field under Additional options (optional), with Key = "url" and Value = {desired URL}.
To subscribe to a Firebase topic, set firebaseTopic in Config.swift to the name of the topic you would like.
Do you want to get each individual user ID on your server for further processing and individual user push messages? Just activate the kFirebaseEnhanceUrl option in Config.swift (by switching the value from false to true) in order to append ?firebase_push_id=XYZ to your WebView URL. If your WebView URL is https://www.example.org, WebViewGold will call https://www.example.org?firebase_push_id=XYZ instead. Only your FIRST URL request will get that GET variable, so save it in a session or in a cookie to access it on your linked pages. An alternative or additional way would be to retrieve & process the information on any page via JavaScript:
<script>
window.location.href = "getfirebaseplayerid://";
alert(firebaseplayerid);
</script>
Option 4: Use bubble.io Push Notifications
1. Create a bubble.io app
2. Install the WebViewGold OneSignal Push plugin:
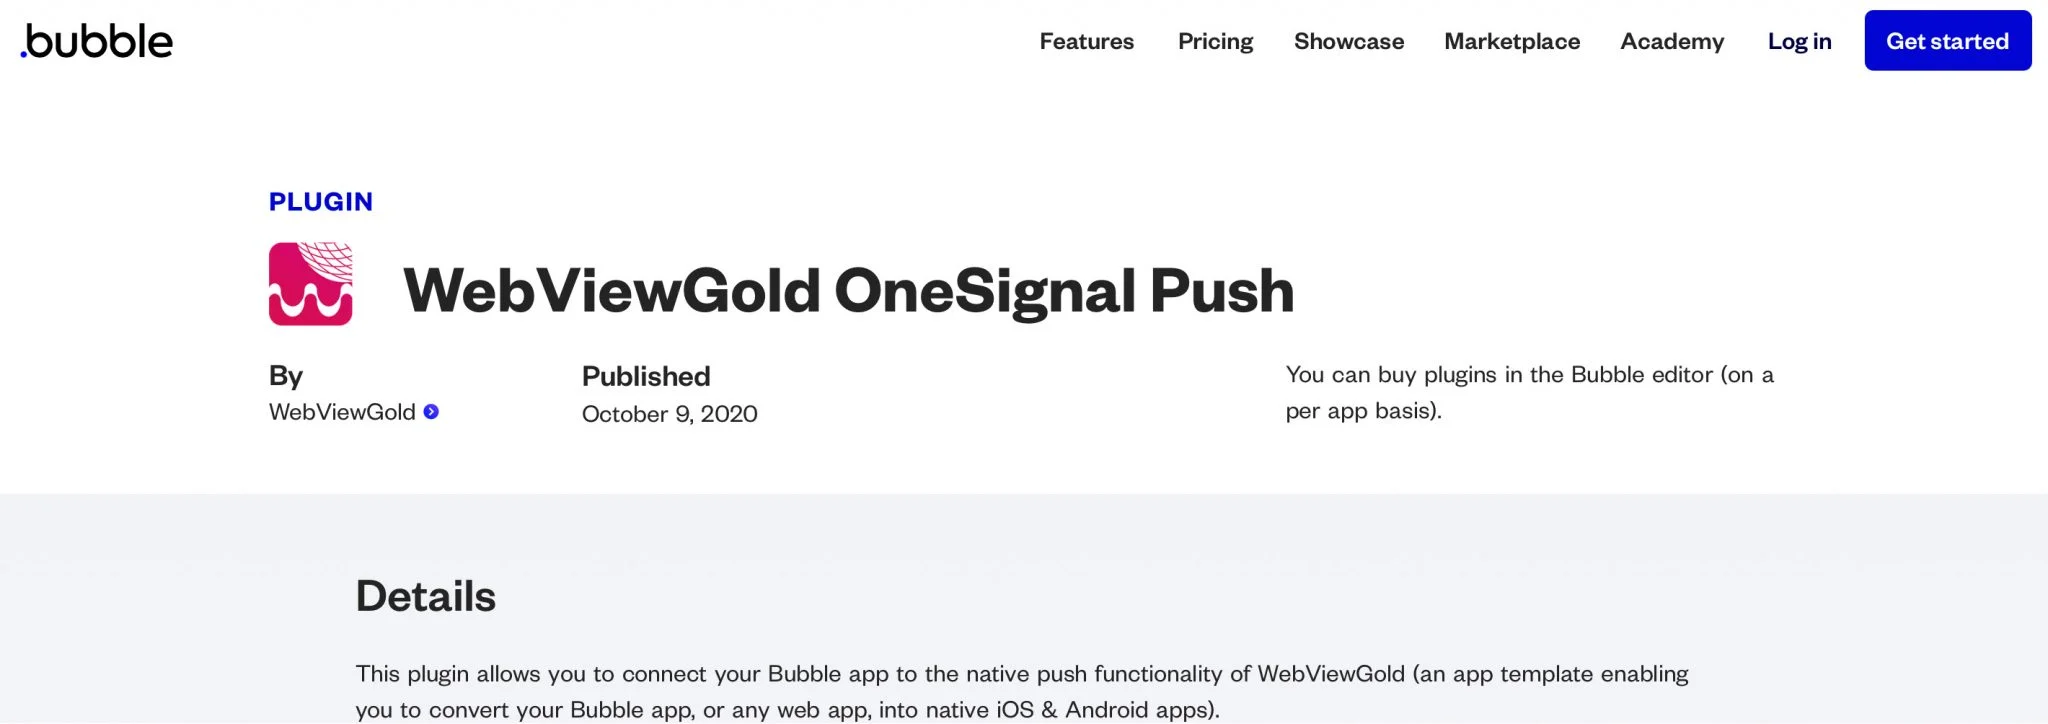
3. Follow the OneSignal instructions (see above) and the plugin instructions (see here and here).
Banner and Interstitial ads via AdMob API
AdMob offers the possibility of monetizing mobile projects. It is a Google-provided service for integrating Google ads into mobile applications. The AdMob program allows mobile application developers to incorporate ads on iOS and Android platforms. The ad space provided by the app developer is paid by clicks (CPC, Cost Per Click) or impressions (CPM, Cost Per Mille). WebViewGold is ready for activating AdMob ads by default, and it allows you to monetize your WebView-based applications.
Open Info.plist file and set your AdMob global account ID in the GADApplicationIdentifier field:
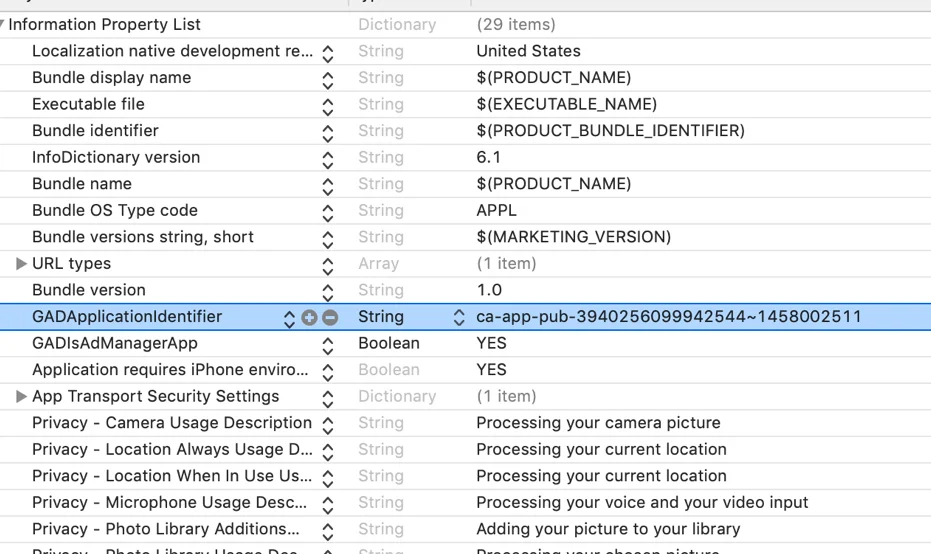
You can activate and deactivate banner and/or interstitial ads and define the interval of appearing interstitial ads. Please set your AdMob IDs in Config.swift file before launching your app:
For more information, please consider the official AdMob SDK documentation as well (but skip the setup parts as WebViewGold already includes the framework).
Interstitial Ads via Facebook Audience Network
The Facebook Audience Network offers the possibility of monetizing mobile projects. It is a Facebook-provided service for integrating Facebook ads into mobile applications. The Audience Network program allows mobile application developers to incorporate ads on iOS and Android platforms. The ad space provided by the app developer is paid by clicks (CPC, Cost Per Click) or impressions (CPM, Cost Per Mille). WebViewGold is ready for activating Facebook Audience Network ads by default, and it allows you to monetize your WebView-based applications.To enable Facebook Ads, the following constants in Config.swift will need to be set

You must create a Facebook Audience Network account and create a property under integration in the Monetization Manager. Then you must connect an iOS app (however, you do not need to link to a published iOS app for testing purposes)
Follow this guide for reference: https://www.facebook.com/business/help/191133327919314
Further considerations:
- A real iOS device must be used to test (not a simulator)
- The device must be added as a test device, see https://developers.facebook.com/docs/audience-network/setting-up/testing/platform
- Facebook must be installed and logged in on the device
- “Limit Ad Tracking” or any similar setting that may be released with upcoming iOS versions must be disabled.
Activate HTML background audio
For some scenarios, it may be useful to play audio content even after minimizing the app (for example, if you're making a radio stream or your music available in the app). Please take a look at the video to learn how your app's audio can play even when users switch to a different foreground app or when they lock their iPhone or iPad.
Downloader for PDF, ePub, Wallet, Documents, and Music Files
If you offer to download or view documents or other downloads in your web app, our WebViewGold Download API will help you for the tremendous and native user experience of your app.
Save images to the camera roll of the user by calling links with savethisimage://?url= prefix:
<a href="savethisimage://?url=IMAGE URL HERE">Link</a>
Save files by calling links with a relevant suffix (e.g., .mp3):
<a href="https://www.example.org/file.pdf">Link< PDF/a>
<a href="https://www.example.org/file.mp3">Link mp3 Music</a>
<a href="https://www.example.org/file.mp4">Link mp4 Music</a>
<a href="https://www.example.org/file.wav">Link wav Music</a>
<a href="https://www.example.org/file.epub">Link epub eBook</a>
<a href="https://www.example.org/file.pkpass">Link Passbook / Apple Wallet</a>
<a href="https://www.example.org/file.docx">Link Word</a>
<a href="https://www.example.org/file.pptx">Link PowerPoint</a>
<a href="https://www.example.org/file.xlsx">Link Excel</a>
You can add more filetypes that should trigger the file downloader functionality (e.g., .epub, .zip, ...) This can be done via the list variable extentionARY that can be found in the Config.swift file.
Also, consider turning on autodownloader if you want to activate the downloader functionality based on Content-Disposition HTTP headers, regardless of the file formats listed in the extentionARY variable mentioned above.
iCal Calendar API
WebViewGold allows the entry of calendar entries if you link to an .ics file:
<a href="https://www.webviewgold.com/demo/test.ics">Save to Calendar</a>
UUID API
WebViewGold allows passing a non-personal, unique device ID (UUID / "Universally Unique Identifier") to JavaScript, which can be used to identify an iOS device uniquely. This can be useful, for example, to save settings or values on the server-side and restore them on the client-side. Please respect local and international privacy regulations if you use this API.
<a href="get-uuid://">Get UDID</a>
<a href="#" onClick="alert(uuid);">Show UDID</a>
Alternatively, you can activate the enhanceUrlUUID option in Config.swift (by switching the value from false to true) in order to append the parameter 'uuid=XYZ' to your WebView URL on the first URL request. If your WebView URL is https://www.example.org, WebViewGold will call https://www.example.org?uuid=XYZ instead. Only the first URL request will get that GET variable, so please save it in a session or in a cookie to access it on your linked pages.
Reset App API
Sometimes only a restart helps. This is true in life as well as in digital life. Click on this link to reset your users' app to app factory settings (by clearing all cookies and cache):
<a href="reset://">Link</a>
Insert the https://www.onlineappcreator.com/reset_test.html URL into your WebViewGold app for a demo.
Get User App Tracking Decision
In iOS, apps have to ask to track user data based on the Apple AppTrackingTransparency framework. WebViewGold allows you to see what choice the user made when they installed your app to act accordingly in your web app. The JavaScript variable trackingDisabled can be either set by WebViewGold to true to represent that tracking has been blocked or false if it hasn't been. On your web app, you can easily check the JavaScript status by first getting the JavaScript variable and then alerting it:
<a href="user-disable-tracking://">Set JavaScript variable</a>
<a href="#" onClick="alert(trackingDisabled);">Show tracking decision</a>
Show/hide the loading sign manually
The native iOS loading indicator of WebViewGold will be triggered automatically when a page starts or finishes loading. However it could be useful to know that it can be triggered manually as well (e.g., you could show the activity indicator as well when waiting in your live chat queue, or some cloud server action is running in the background, and you want to visualize the process on the client):
<a href="spinneron://">Show the loading spinner</a>
<a href="spinneroff://">Hide the loading spinner</a>
URL Handling API
It often makes sense in WebView based apps to treat different web addresses differently. If you place a social media button in your web app, a click on it should probably not open the social media page in your app, but in the right app (e.g., the system browser). It's good that WebViewGold has all the features to enable powerful configuration and treat links the way you want it. Open Config.swift and configure the URL Handling API easily:Open links in a tab/additional In-App-Browser
There are some cases for links that do not feel to be "important enough" to open them in the Safari browser externally but "too specific" for opening them in the app WebView itself (e.g., your Terms and Conditions page). For this particular kind of links, we added a creative idea of URL Handling: a tab that opens an additional in-app-browser over the main WebView content itself. It will look like this:
As you see, this in-app-browser includes an address bar and navigation buttons (including an "Open in Safari" button). That's a considerable difference to the primary, full-screen WebView content. So this kind of combination of app and browser experience is great for tutorials, knowledge databases, and all type of content that requires any type of navigation. To use this kind of in-app-browser, set openspecialurlsinnewtab to "true" and link to an URL in this format:
<a href="https://www.example.com" target="_blank">Open link in an in-app tab</a>
Simply, a special link is classified as a link that has the "_blank" target attached. In a normal browser, this would make the link open in a new tab. In WebViewGold app, you can make it open in the in-app tab instead.
Please note that if the link you are using is external (has a different domain to your website like "www.google.com", for example) please also make sure that openallexternalurlsinsafaribydefault is set to "false" as it will override the special-external link to open in the Safari app instead.
Please insert https://www.webviewgold.com/demo/testlinks.php as WebView URL to test how your app will handle different types of links. You can open the same domain https://www.webviewgold.com/demo/testlinks.php in your desktop browser and see the source code to copy & paste the way of link.
Custom CSS and JavaScript API
WebViewGold's Custom CSS feature offers a hassle-free way to tailor the look of your web app without having to modify the app's native CSS style sheets. Enter your custom CSS into the custom.css file, save your changes, and watch as your modifications take effect across all website loads requested by your WebViewGold-built app.
Similarly, the Custom JavaScript feature lets you tweak your web app’s behavior for app users without altering the web app’s original remote code. Save your custom JavaScript code in the custom.js file and it will be applied across all website loads initiated by your WebViewGold-created application.
With the Custom CSS feature of WebViewGold, you can effortlessly customize your app by choosing your preferred colors, incorporating captivating animations, and adding other exciting features to enhance the user experience!
The Custom JavaScript feature of WebViewGold enables you to enhance the user experience by personalizing your app with features such as alerts, alarms, and much more.
Universal Links API
Using our Universal Links API, linking to content within your app is simplified and it leads to a more native experience. WebViewGold enables you to set up your domain so that links from the Mail app, Safari app, and others directly open within your WebViewGold-based app. Note that the app needs to be installed first for this feature to work. Alternatively, please explore the Deep Linking API. While it operates in a similar manner, it offers a different syntax. However, it's worth noting that the syntax of the Universal Links API is more common than the syntax of the Deep Linking API. Plus, WebViewGold for Android also supports the Universal Links API (there "App Links API"), adding to its advantages. In any case, for most apps, it's wise to choose either one, but not both.
- Apple Developer Center Setup:
- Log in to your account on the Apple Developer Center.
- Click on 'Certificates, Identifiers & Profiles'.
- Under 'Identifiers', select 'App IDs' and then choose your app's ID from the list.
- Under the 'App Services' section, check the 'Associated Domains' option and save your changes.
- Xcode Setup:
- Open your app project in Xcode.
- Select the target (in most cases "WebViewGold"). In the 'Signing & Capabilities' tab, navigate to the 'Associated Domains' section. Click on '+' to add a domain. Your domain should be prefixed with 'applinks:', like this:
applinks:example.org&applinks:www.example.org: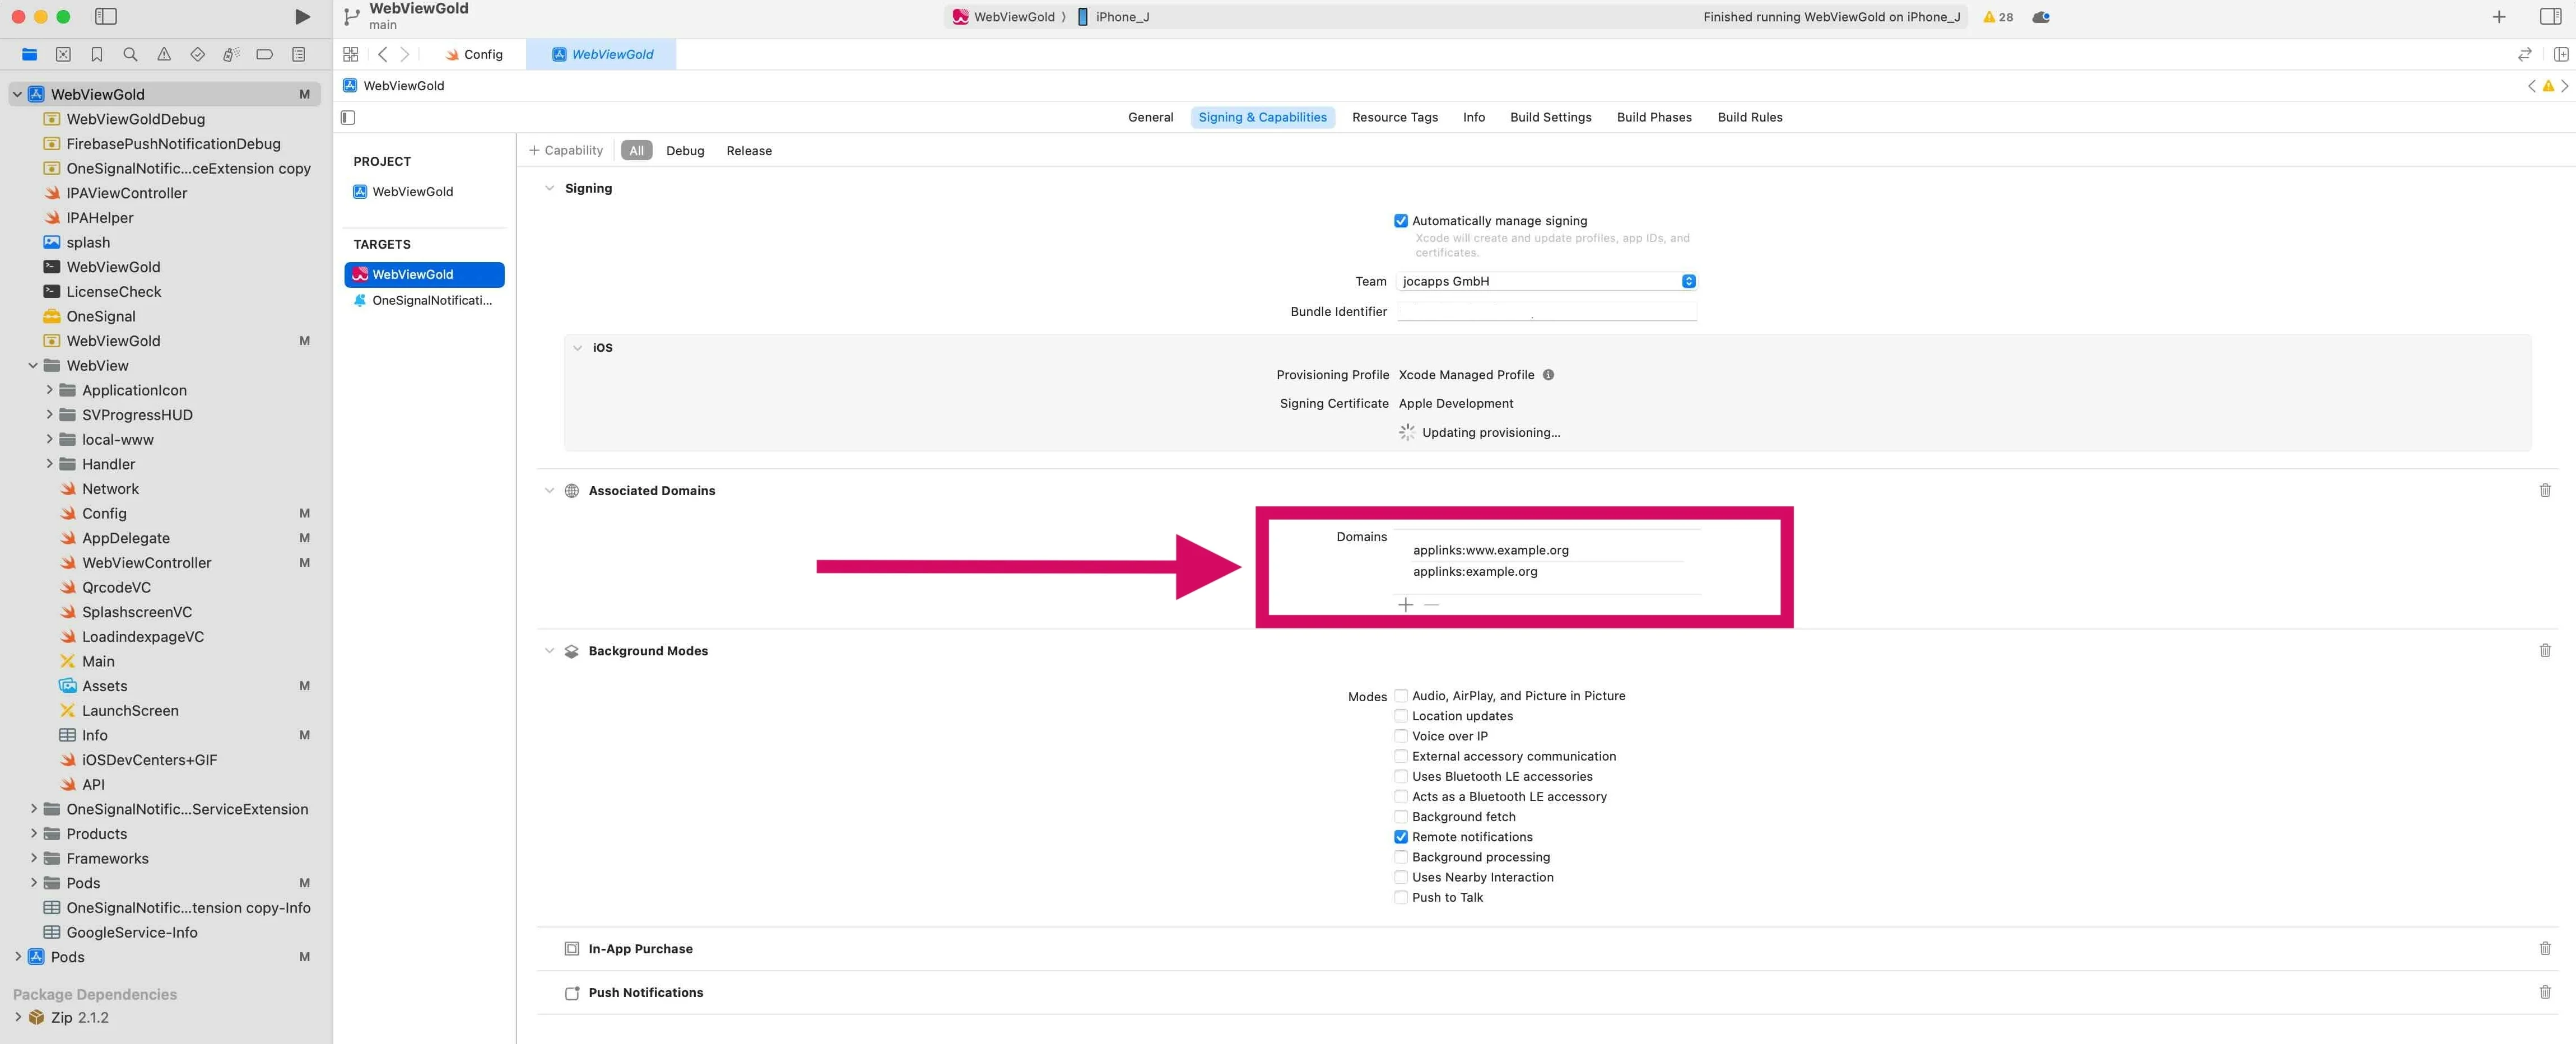
- In Config.swift, turn ShowExternalLink to true.
- Be mindful of subdomains. There's a distinction between "www.*" and non-"www" domains (consider adding both). Ensure that you have the correct provisioning profile with the 'Associated Domains' capability. If not, Xcode should prompt you to fix it.
- Server Setup:
- On your website server, you need to host an Apple App Site Association (AASA) file at the root level of your server or using the
/.well-known/prefix. E.g.,https://example.org/.well-known/apple-app-site-association - The AASA file should contain details about the app and the associated domains. Refer to the official documentation for the exact structure. Ensure that the apple-app-site-association file is hosted on a server that supports HTTPS, not just HTTP.
Done! :-) Testing in the Simulator isn't as effective as on a real device. For best results, use an actual iPhone or iPad.
Deep Linking API (configure a link scheme like webviewgold://)
With deep linking, it becomes easy to link to content inside your app. WebViewGold allows configuring a link scheme like webviewgold:// (called a Custom URL Scheme) which can be triggered from the Mail app, Safari app, ... and opens the attached link in the WebView app. Note that the app needs to be installed first for this feature to work. Alternatively, please explore the Universal Links API. While it operates in a similar manner, it offers a different syntax which is more common than the syntax of the Deep Linking API. Plus, WebViewGold for Android also supports the Universal Links API (there "App Links API"), adding to its advantages. In any case, for most apps, it's wise to choose either one, but not both.
Please change the scheme to your own app name (like your-app-name:// instead of webviewgold://) in Info.plist: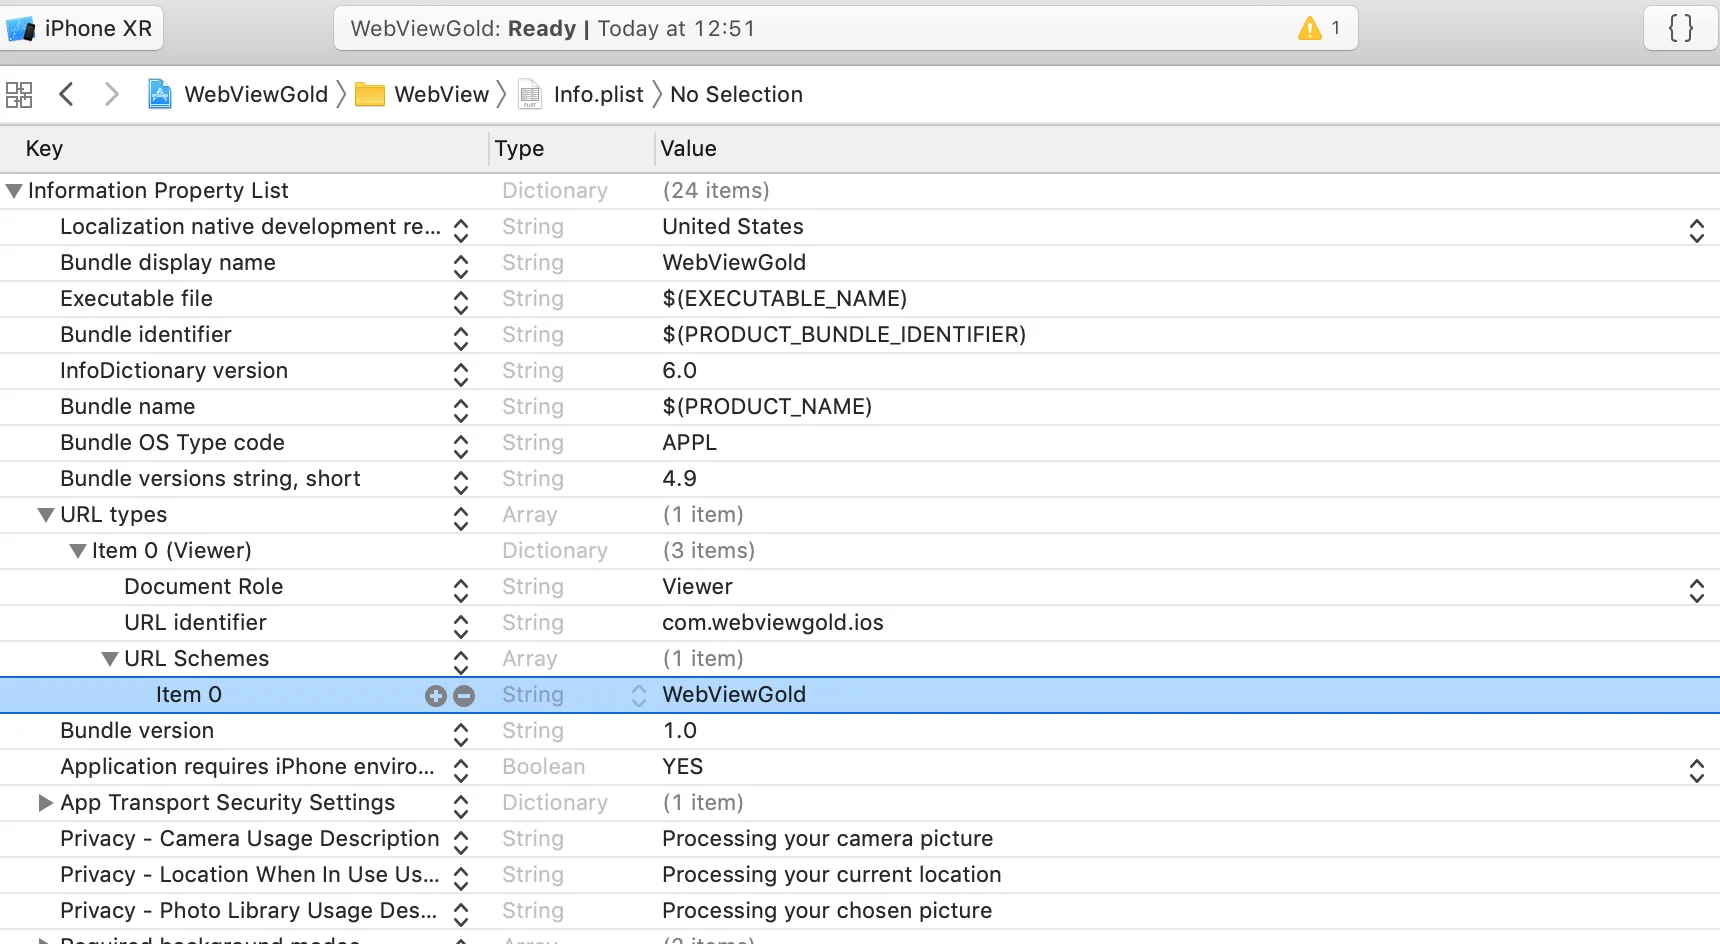
Afterward, activate the ShowExternalLink option in Config.swift file:
Done! :) Example format:
WebViewGold://url?link=https://www.google.com
(would open google.com in the WebView app).
App Sharing Dialog API
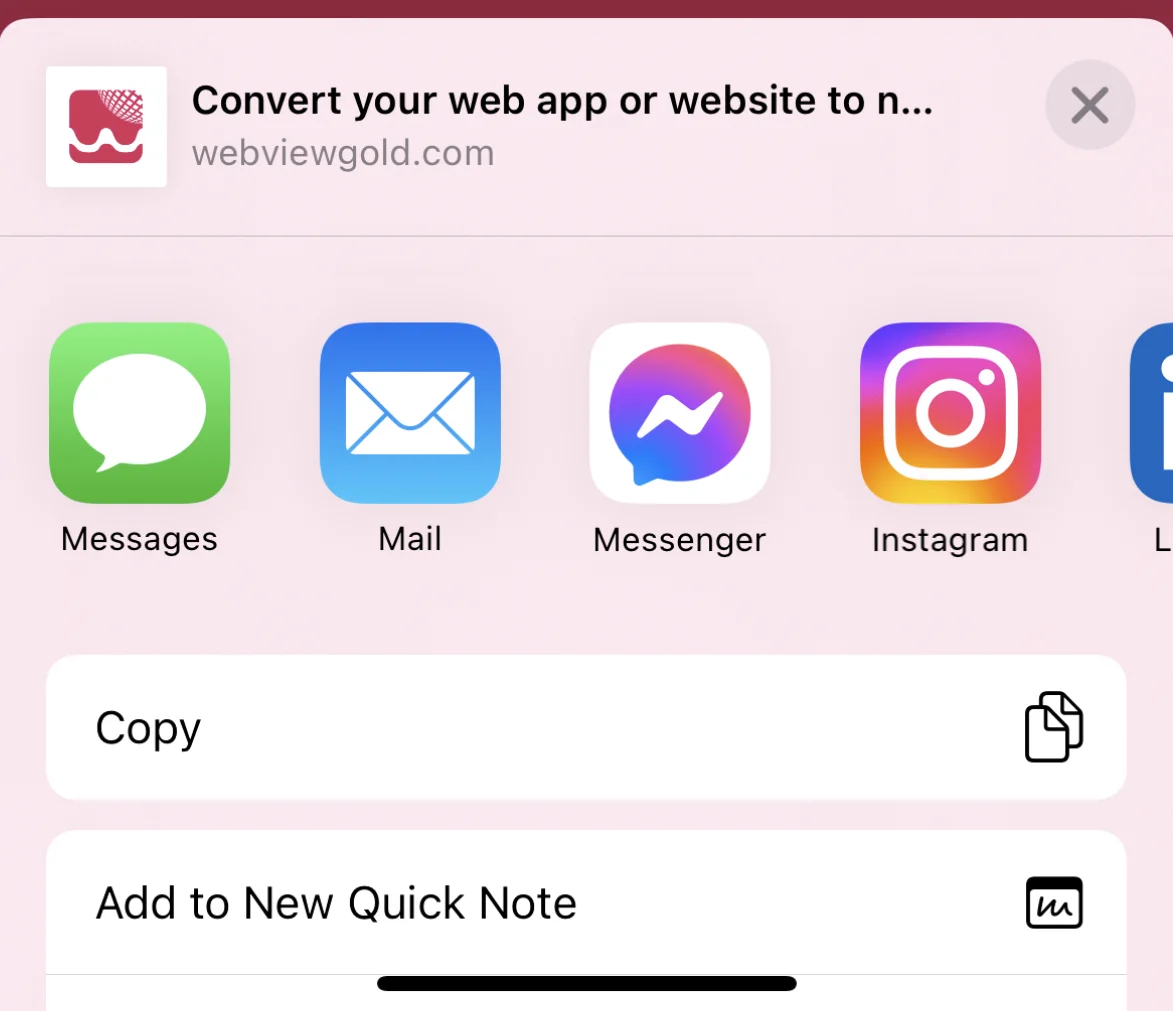
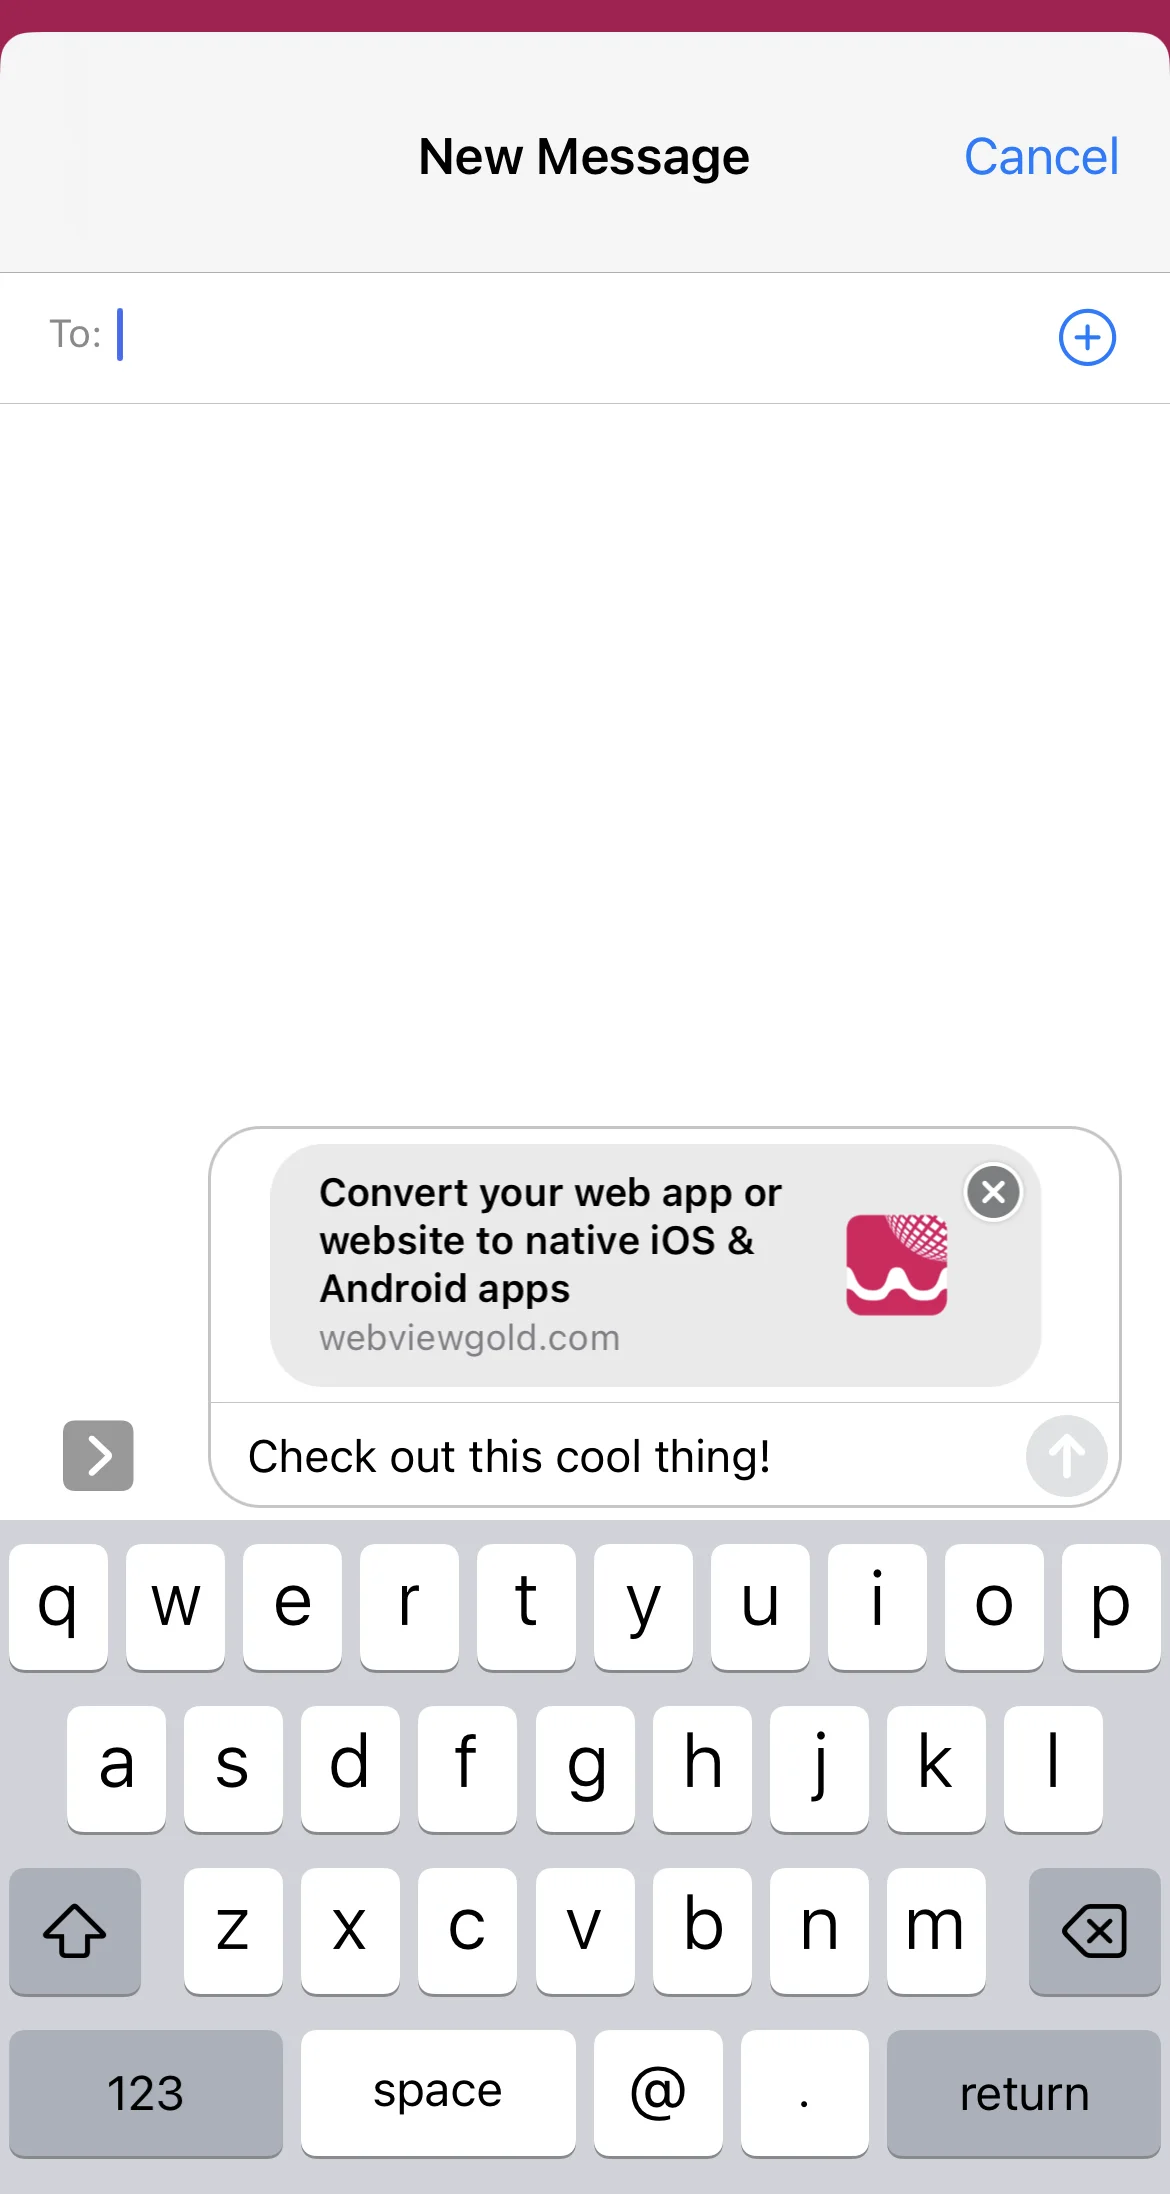
The Sharing Dialog functionality of WebViewGold gives your app users the ability to share the download link of your application with their friends, family, and colleagues. It's an incredibly smooth and effective way of expanding the user base of your application. It can also be used to share any generic message and/or link!
WebViewGold allows triggering a native App Sharing Dialog dialog (WhatsApp, SMS, Mail, ...) by calling shareapp:// links:
<a href="shareapp://message?=Check out this cool thing!&url=https://www.webviewgold.com">Share (message, link)</a>

<a href="shareapp://message?=&url=https://www.webviewgold.com">Share (no message, link)</a>

<a href="shareapp://message?=Check out this cool thing!">Share (message, no link)</a>
In-App Purchase & In-App Subscription API
Within some apps, you can buy additional content or services. These kinds of purchases are called "in-app purchases". They can be an attractive source of revenue for developers and are very convenient for customers as they use existing accounts and payment sources for settlement. WebViewGold allows triggering App Store In-App Purchases. Make sure to own an Extended License of WebViewGold if you plan to use this feature in an end product. In the first step, insert the App Store Connect details of your In-App Purchase "Shared Secret" in Config.swift file. To find your "Shared Secret" in App Store Connect, you need to first log into your App Store Connect account. Then, go to the "Users and Access" section, and select the "Shared Secret" tab. Your generated "Shared Secret" will be listed, and you can copy/paste it to the relevant "IAPSharedSecret" field in Config.swift of WebViewGold.
We care about the success of our customers and are here to support them in any way we can: That’s why we want to mention the App Store Small Business Program here. Under this program, eligible developers can qualify for a reduced 15% commission down from the standard 30% commission. It only takes minutes to fill out their form, and it can potentially save you 50% of fees (reduction from 30% Apple commission to 15% Apple commission). Once approved, you will receive the reduced commission rate for all paid apps and in-app purchases made by customers on the App Store. Find more information here.
After setup, for in-app purchase products just link to this kind of URL:
<a href="inapppurchase://?package=IN-APP_PURCHASE_PRODUCT_IDENTIFIER&successful_url=https://www.google.com">Buy In-App Purchase</a>
- The "package" is the product identifier of the item you want to sell.
- The "successful_url" is the URL you want the app to load once the purchase is complete.
- You may want to save a cookie on this page so that your web app remembers that the purchase has been made.
For in-app subscription products, use this kind of URL scheme:
<a href="inappsubscription://?package=IN-APP_PURCHASE_PRODUCT_IDENTIFIER&successful_url=https://www.google.com&expired_url=https://www.yahoo.com">Start In-App Subscription</a>
- The "package" is the product identifier of the subscription you want to sell.
- The "successful_url" is the URL you want the app to load once the purchase is complete.
- You may want to save a cookie on this page so that your web app remembers that the subscription has been activated.
- The "expired_url" is the URL you want the app to load when the subscription is no longer valid.
- You may want to update/delete a cookie on this page so that your web app remembers that the subscription has been deactivated.
All information about the In-App Purchase Product Identifier can be found here.
You can identify the user server-side. e.g., the site /buy_now.php redirects to In-App-Purchase API and that API redirects to /thanks.php, you can still access the user/session cookies server-sided and identify the user who just bought that In-App-Purchase. In this use case, please make sure that you deactivate the deletecache option in the Config.swift file in order to keep cookies activated by the In-App Purchase process.
Note: Using our API for delivering paid content to app users does carry some risk of technically savvy users accessing the content without paying for it. This could occur through various methods, such as retrieving and opening the Success URL link directly, canceling subscription products after uninstalling the app, or using withdrawal rights and chargeback processes for credit cards. However, it is crucial to note that some level of risk is present with any digital approach. While we continue to work on ways to reduce these risks, it is ultimately up to the WebViewGold user/developer to accept the risk of unauthorized/unpaid access to content when using the suggested approach, as the API comes without a warranty. Despite this, the benefits of using our API generally outweigh the risks for most users. To ensure accurate revenue reporting and identify potential discrepancies, we recommend tracking and comparing the sales data of App Store Connect with server-side activations of in-app purchase products.
QR Code Scanner API
QR codes are two-dimensional versions of the barcode. QR stands for "quick response". The term refers to the immediate access to the hidden information in the code. Both their design and their functions can be personalized, and they are ideal for connecting conventional print media with any and interactive online offer. WebViewGold offers a built-in QR code scanner that allows scanning these codes and opening the encrypted URL in the WebView afterwards.
Link to this kind of URL to trigger the QR Code Scanner:
<a href="qrcode://">Scan QR Code</a>
Scanning Mode API
If your web app presents information on the screen to be scanned (for example, a QR code), it can be helpful to turn the screen brightness up to 100% and to prevent the screen from sleeping. WebViewGold provides the Scanning Mode API to dynamically enable these optimal scanning conditions.
This API includes 3 commands:
- "auto" = turns on scanning mode and automatically turns it off on page redirect.
- "on" = turns on scanning mode, stays on after page redirects.
- "off" = turns off scanning mode.
Link to these kinds of URLs to use the Scanning Mode API:
<a href="scanningmode://auto">Enable Scanning Mode; will automatically disable on page redirect.</a>
<a href="scanningmode://on">Enable Scanning Mode; will persist until manually disabled.</a>
<a href="scanningmode://off">Disable Scanning Mode.</a>
Take Screenshot API
The screenshot API of WebViewGold allows you to take screenshots programmatically from the WebView content and save them to the Photos gallery of your app user. One possible use case for this API is, for example, to programmatically save a screenshot of your e-tickets (for festivals, travels, …) of your web app so that they can be shown when the user is offline and cannot access the WebView content (e.g., while being in a festival location, on a train ride, …).
Link to this kind of URL to trigger a screenshot:
<a href="takescreenshot://">Save</a>
App Version Check API
Using this WebViewGold JavaScript API approach, your website/web app can retrieve the version of the iOS app being used by your app user. This is especially helpful if you want to notify users of an older version to update their app. Moreover, you can hide web app sections that require app features supported by a specific app version.
Use JavaScript to this kind of URL to read and alert the app version and app bundle number:
<script>
window.location.href = "getappversion://";
alert(versionNumber);
alert(bundleNumber);
</script>
Dynamic UI API
WebViewGold allows you to dynamically customise the UI elements in your web app. These elements may consist of the status bar, bottom bar (iOS), navigation bar (Android) and pull to refresh (iOS). WebViewGold includes the following commands to dynamically customise these elements:
- statusbarcolor://
- The MASTER COMMAND to change the color of the status bar and any other relevant UI features automatically, such as the status bar text color, the bottom bar color (iOS), navigation bar color (Android), etc.
- statusbartextcolor://
- Allows you to manually change the text color of the status bar (iOS and Android).
- bottombarcolor://
- If a bottom bar (iOS) or navigation bar (Android) UI element exists, allows you to manually change its color.
Changing the color of the Status Bar (and other UI elements automatically):
This feature supports a color input in the following format:
- RGB = {red, green, blue}
Use JavaScript to this kind of URL to change the color of the status bar:
<script>
// Example: red
window.location.href = "statusbarcolor://255,0,0";
</script>
When you change the status bar color, the status bar text will automatically change to a suitable color (white or black) depending on how dark the color is.
Optional UI features like Pull To Refresh (iOS), the Bottom Bar (iOS) and the Navigation Bar (Android) will also have their colors automatically adjusted.
Changing the color of the Status Bar text:
If you would like to manually choose the color of the status bar text, you can do so using this option.
This feature supports a text input for the following options:
- "white"
- "black"
<script>
// Example: white text
window.location.href = "statusbartextcolor://white";
// Example: black text
window.location.href = "statusbartextcolor://black";
</script>
Changing the color of the Bottom Bar:
This feature supports a color input in the following format:
- RGB = {red, green, blue}
Use JavaScript to this kind of URL to change the color of the status bar:
<script>
// Example: red
window.location.href = "bottombarcolor://255,0,0";
</script>
Dynamic App Icon API
This API allows the users of your app to change the app icon with the click of button. WebViewGold allows up to three alternative app icons from your default app icon. Whenever the app icon is dynamically changed, the user will be notified upon successful completion:![]()
If you wish to change the app icon of your app on behalf of your users, you can do so by publishing a new version of your app with the new app icon installed. See how to change your app icon on WebViewGold here.
To dynamically change the app icon, just link to one of the following URL formats:
<script>
// Change to Alternative App Icon 1
window.location.href = "changeicon://icon1"

// Change to Alternative App Icon 2
window.location.href = "changeicon://icon2"

// Change to Alternative App Icon 3
window.location.href = "changeicon://icon3"

// Revert to the Default App Icon
window.location.href = "changeicon://default"

</script>
View a demonstration and testing page for this API here.
To set your alternative app icons, open your app files in Finder and navigate to WebView-Swift/WebView/ApplicationIcon/AppIconAlternate.
In this folder, you will see template app icons for all of the required app icon sizes in iOS (iPhones and iPads), for each alternative icon:
The default names of each alternative app icon are: "AppIconAlternate1", "AppIconAlternate2" and "AppIconAlternate3".
If you like, you can change the default names by editing the alternativeAppIconNames variable in the Config file:
Each app icon (for example, 'AppIconAlternateX') requires five different sizes, which are described by the file name suffix:
- For iPhones:
- AppIconAlternateX (60x60 pixels)
- AppIconAlternateX@2x (120x120 pixels)
- AppIconAlternateX@3x (180x180 pixels)
- For iPads:
- AppIconAlternateX-ipad@2x (152x152 pixels)
- AppIconAlternateX-ipad@3x (167x167 pixels)
When replacing these template app icons with your own, make sure they follow the same file name format (with the suffixes listed above) with the correct image size.
View a more detailed guide on app icon specifications here.
To activate this API (also for App Store Review), please open Info.plist as source code (right-click on the file and select "Open As" -> "Source Code" from the contextual menu): Within Info.plist, search for
<key>CFBundleIcons</key>
	<dict>
		<key>CFBundlePrimaryIcon</key>
		<dict>
			<key>CFBundleIconFiles</key>
			<array>
				<string></string>
			</array>
			<key>UIPrerenderedIcon</key>
			<false/>
		</dict>
	</dict>
and replace it with
<key>CFBundleIcons</key>
<dict>
	<key>CFBundleAlternateIcons</key>
	<dict>
		<key>AppIconAlternate1</key>
		<dict>
			<key>CFBundleIconFiles</key>
			<array>
				<string>AppIconAlternate1</string>
			</array>
			<key>UIPrerenderedIcon</key>
			<false/>
		</dict>
		<key>AppIconAlternate2</key>
		<dict>
			<key>CFBundleIconFiles</key>
			<array>
				<string>AppIconAlternate2</string>
			</array>
			<key>UIPrerenderedIcon</key>
			<false/>
		</dict>
		<key>AppIconAlternate3</key>
		<dict>
			<key>CFBundleIconFiles</key>
			<array>
				<string>AppIconAlternate3</string>
			</array>
			<key>UIPrerenderedIcon</key>
			<false/>
		</dict>
	</dict>
	<key>CFBundlePrimaryIcon</key>
	<dict>
		<key>CFBundleIconFiles</key>
		<array>
			<string></string>
		</array>
		<key>UIPrerenderedIcon</key>
		<false/>
	</dict>
</dict>
Moreover, search for
<key>CFBundleIcons~ipad</key>
<dict>
    <key>CFBundlePrimaryIcon</key>
    <dict>
        <key>CFBundleIconFiles</key>
        <array>
            <string></string>
        </array>
        <key>UIPrerenderedIcon</key>
        <false/>
    </dict>
</dict>
and replace it with
<key>CFBundleIcons~ipad</key>
<dict>
	<key>CFBundleAlternateIcons</key>
	<dict>
		<key>AppIconAlternate1</key>
		<dict>
			<key>CFBundleIconFiles</key>
			<array>
				<string>AppIconAlternate1-ipad</string>
			</array>
			<key>UIPrerenderedIcon</key>
			<false/>
		</dict>
		<key>AppIconAlternate2</key>
		<dict>
			<key>CFBundleIconFiles</key>
			<array>
				<string>AppIconAlternate2-ipad</string>
			</array>
			<key>UIPrerenderedIcon</key>
			<false/>
		</dict>
		<key>AppIconAlternate3</key>
		<dict>
			<key>CFBundleIconFiles</key>
			<array>
				<string>AppIconAlternate3-ipad</string>
			</array>
			<key>UIPrerenderedIcon</key>
			<false/>
		</dict>
	</dict>
	<key>CFBundlePrimaryIcon</key>
	<dict>
		<key>CFBundleIconFiles</key>
		<array>
			<string></string>
		</array>
		<key>UIPrerenderedIcon</key>
		<false/>
	</dict>
</dict>
This is the default setting regarding alternative app icon names ä amount of alternative app icon files.
Biometric Authentication API
This API allows you to use biometric authentication in your app. Biometric authentication includes Face ID (in newer iPhone designs) and Touch ID (in older iPhone designs). By calling the "bioauth://" URL command, you can trigger the biometric authentication natively in your app. Once the process is complete, WebViewGold will report the results back to your web app by calling one of the following functions:
- onBioAuthSuccess()
- Called when the authentication process was successful.
- onBioAuthFailure(errorCode, errorMessage)
- Called when the authentication process fails and provides error information.
- onBioAuthUnavailable()
- Called when biometric authentication is found to be unavailable on the device.
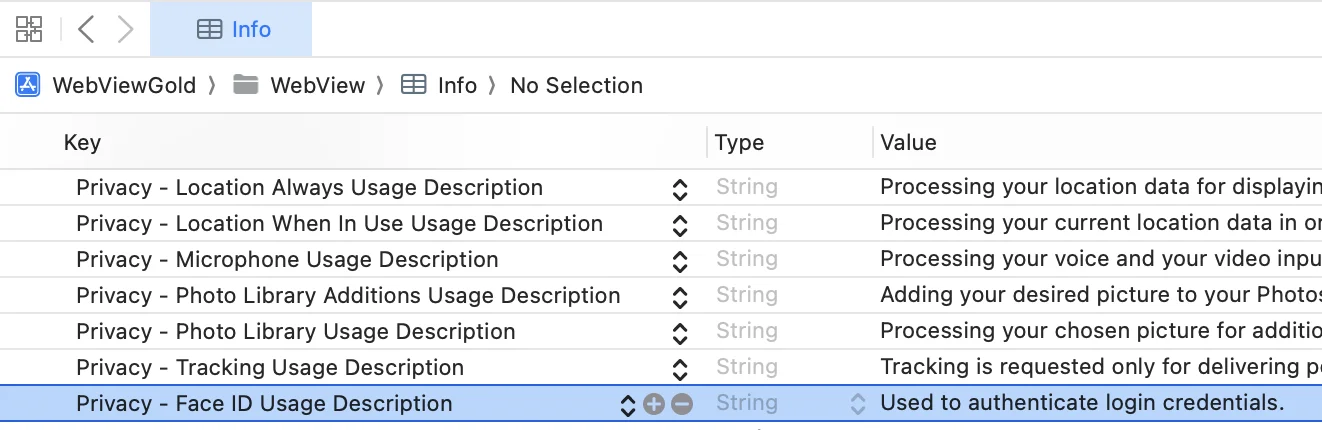
To use this API, first, you must add the privacy key for Face ID biometric authentication in your Info.plist file. This is done by opening Info.plist, hovering over an exisiting key, clicking the (+) symbol to add a new key below your currently selected one and selecting the "Privacy - Face ID Usage Description" key option. Without this key, the app will not support Face ID. The value for this key is a description that ia presented to the user the first time your app attempts to use Face ID. This description should clearly explain why your app needs to use Face ID. See below for an example description for this key:
Next, you must define the following functions (in JavaScript) in your web app to handle the results of a biometric authentication:
<script>

function onBioAuthSuccess() {
    alert("Bio Authentication Succeeded");
}

function onBioAuthFailure(errorCode, errorMessage) {
    // errorCode = Int, errorMessage = String
    alert(`Bio Authentication Failed, ${errorMessage} (code ${errorCode})`);
}

function onBioAuthUnavailable() {
    alert("Bio Authentication Unavailable");
}

</script>
Then, load this kind of URL to trigger the biometric authentication process in your web app:<script> window.location.href = "bioauth://"; </script>
Security Notice: It should be noted that malicious users may be able to cause the onBioAuthSuccess() function to be called without completing the authentication process. Since authentication is a sensitive process, it is recommended to add an extra layer of security in your web app, such as a cookie or geolocation check, to help ensure the integrity of the authentication. Please consult your website cybersecurity expert for tailored guidance for your web app's needs.
Haptic Feedback API
WebViewGold allows for the implementation of native iOS haptic control within your web app. Using our API, you are able to perform the following actions:
We suggest previewing Apple's best practices overview before including these features into your application. An example of how this API can be utilised can be seen below, with an anchor tag and custom javascript function which interact with our haptic API.
<a onclick="lightHaptic('index.html')">Navigation Link with Haptics</a>

<script>
function lightHaptic(url) {
  if (isWebViewBrowser) {
    window.location.href = url;
    loadInnerHref("lighthaptic://");
  } else {
    window.location.href = url;
  }
}

/* used when we've already just changed the window.location.href but
want to change it again for API calls - iOS */
function loadInnerHref(url) {
  iFrame = document.createElement("iframe");
  iFrame.setAttribute("src", url);
  document.body.appendChild(iFrame);
  iFrame.parentNode.removeChild(iFrame);
  iFrame = null;
}
</script>
Click here to view a demonstration web page for this feature. Inspect the page to view the example code.
MultiAPICall Feature
This is an optional feature for iOS since Apple-based browsers process multiple page reloads on the same script differently to Android-based browsers.
This means calling window.location.href = "exampleAPItrigger" multiple times on the same web page script will not work on iOS, unlike on Android.
The MultiAPICall feature allows you to call multiple APIs in a single window.location.href assignment at the end of your web page script. This may be useful to you if you wanted to pre-load more than one data feature from the app, ready to be used on a page.
MultiAPICall supports the following data collection APIs as entries:
"get-uuid", "user-disable-tracking", "getonesignalplayerid", "getappversion", "__haptics (light, medium, heavy, success, warning, error)"
Use JavaScript to this kind of URL to call multiple APIs at once (make sure to include a check to only use on the iOS platform):
<script>
// Example combination: "getonesignalplayerid" and "getappversion"

if (getMobileOperatingSystem() == "iOS") {
    // iOS: Use MultiAPICall feature, separate API names by commas (","), NO spaces
    window.location.href = "multiapicall://getonesignalplayerid,getappversion";
} else {
    // Android: Can handle multiple calls at once, use normal API call structure
    window.location.href = "getonesignalplayerid://";
    window.location.href = "getappversion://";
}
</script>
Click here to view a demonstration web page for this feature. Inspect the page to view the example code.
NFC Plugin
NFC (Near Field Communication) technology is one of the latest technologies that has become very popular among mobile users. It is becoming the standard way to connect a device with physical products (like card-readers, NFC cards, …).
NFC in WebView apps can be utilized to share content between web pages and NFC devices. For example, developers can use this technology to create a web page that enables users to view and interact with content on their NFC cards or NFC devices without managing the NFC read/write process itself.
NFC is not part of the general WebViewGold feature scope. We offer a custom, easy WebViewGold NFC plugin integration (via JavaScript) on an individual basis. Please send us your requirements (e.g., writing/reading text snippets and/or contact card details to/from NFC tags) via an email to webviewgold-nfc@onlineappcreator.com for a free consultation and a non-binding quote.
Build and publish your app
Your app is ready, and now it's time to upload it to the Apple App Store and reach an audience of millions? Exciting! The following section will show you how to do it - whether you want to do it yourself or have some work done for you.
Option A) Full App Publishing Service
Sometimes you just want to get more comfortable. Especially when you have a lot to do anyway, or more important decisions to make, or an important deadline. Treat yourself to some support - the appsubmitter.io service is the first choice if you want to have your app published by experts - no certificate stress, no annoying screenshot making, no upload problems, or anything else. Of course, via your own developer account, without any restrictions. Full refund if the app gets rejected by Apple (see Terms and Conditions). Just book a video call.
Option B) Manual Publishing Process
You don't want to use our pleasant submission service, but you want to deal with it yourself? Sure, follow this guide:
Use your Apple Developer Program Subscription to publish your app in the App Store. Before uploading, please change the Bundle Identifier (also called the "Bundle ID"):
Please note that the Bundle Identifier and your app's displayed name (the Product Name) are the only identification components that you need to change in the app template. Please avoid changing the Project Name (called "WebViewGold"; it is the name that sits at the top of the project navigator in the left panel of the Xcode window) as it can cause issues. The Project Name is not visible to users of your app and is not important in the app submission process.
Afterward, please add customized texts to the permission details in terms of location, photo/camera access, and all other API details. Delete permissions which are not required by your app - except for the Privacy - Tracking Usage Description key (which is required by Apple for all apps; removing this key will cause your app to crash). You find the details in Info.plist file: 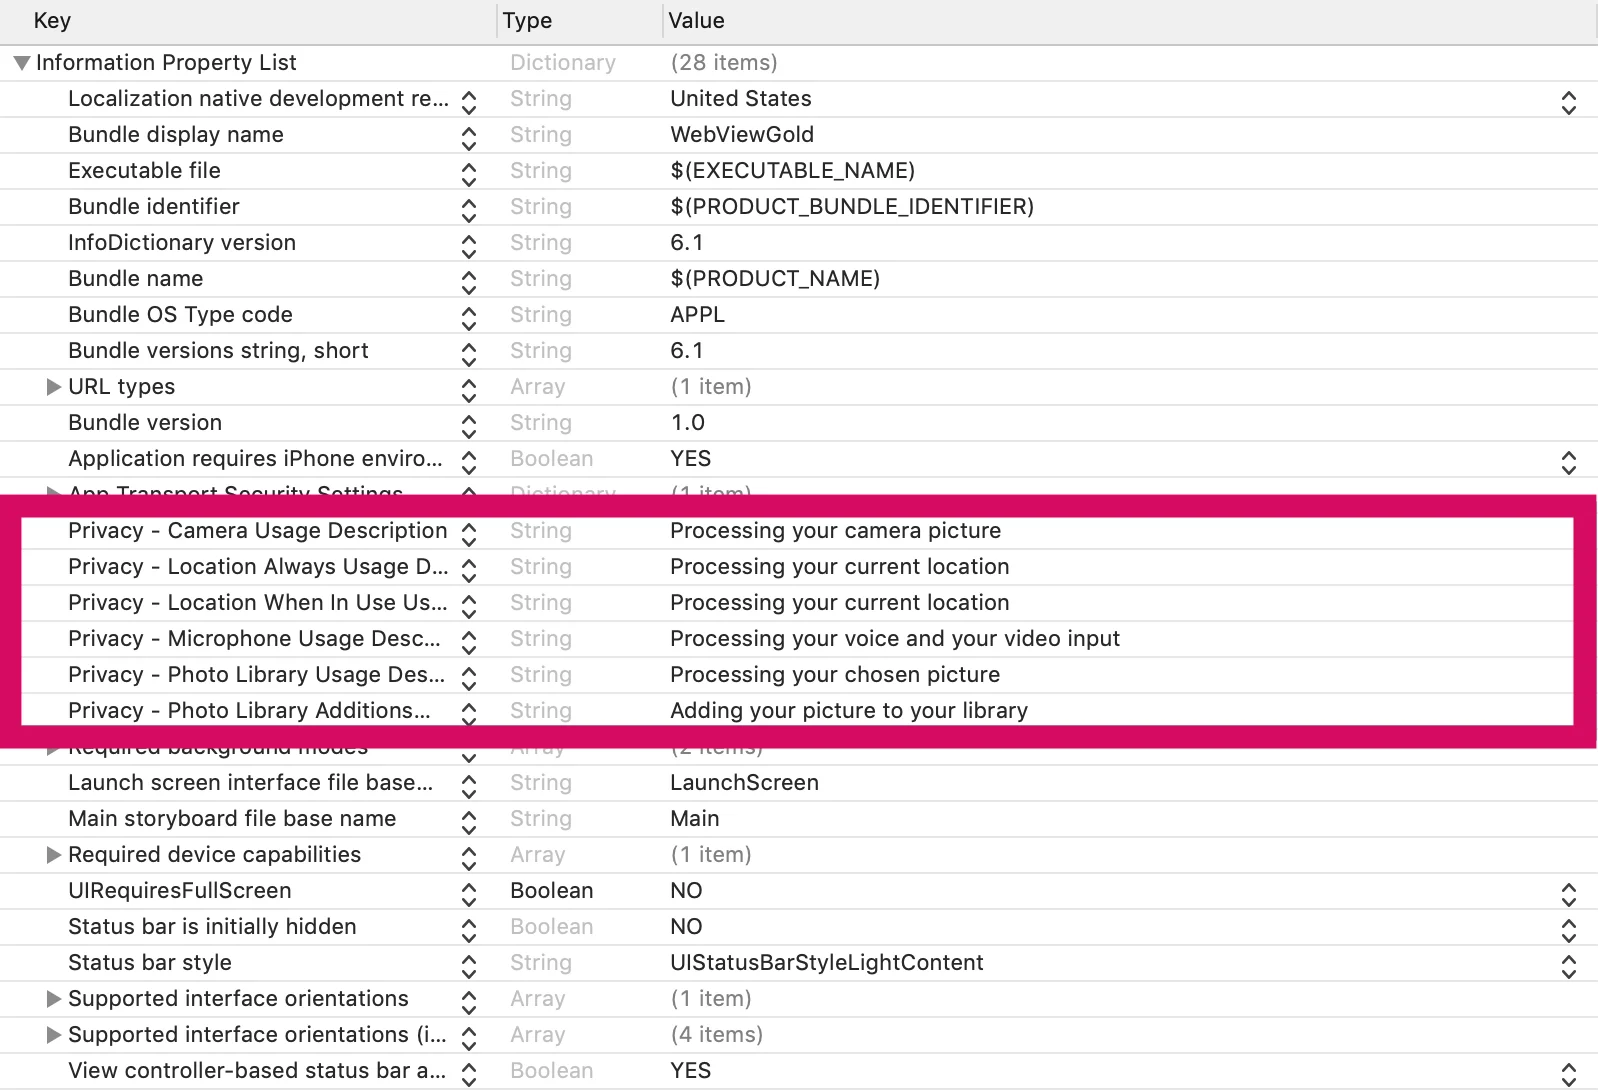
Afterward, please consider a professional User Experience/UX Review on UXreviewer.io or similar services for best App Store approval results. Such a UX review also helps you to achieve better customer retention in general for your product with suggestions for improvement.
Great, now you are ready for the App Store submission of your web app. App Store approval works in most cases without any problems but highly depends on the content you provide in your app as WebViewGold does not provide content by itself. Please make sure to submit an app using a website/web app that behaves like a mobile app (for example, by using responsive design). Make sure that the content does not contradict the legal requirements of the Apple Developer Program. Use different link colors than standard HTML colors for better user experience.
Afterward, please follow the steps of this second video:
One addition to the tutorial video: In timestamp 07:00, after creating the App Identifier, please make sure to activate both the capabilities "App Groups" and "Push Notifications" in the App Identifier section on the Apple Developer Portal (choose the correct App ID here). See these screenshots: https://prnt.sc/xz4hg5 & https://prnt.sc/xz4j01. Restart Xcode afterward.
The App Store upload asks you whether you use encryption? We do not offer legally binding advice, but "No" must be indicated here in most cases. However, if HTTPS is used, an annual security report may have to be submitted to US authorities. More information about this can be found here.
The App Store upload asks you whether you use the Ad ID / IDFA? The Ad ID is included because AdMob is integrated, but not active by default. Removing the AdMob SDK will produce a lot of dependency errors, so the easiest suggestion would be to choose "Yes" at the "Does your app use the Ad ID?" question and selecting the tickbox "Attribute this app installation to a previously served advertisement" only (leave all other tickboxes blank). So, if you use AdMob banner/interstitial ads in WebViewGold, please configure this screen like this. If you do not use AdMob banner/interstitial ads in WebViewGold while the SDK is still embedded (which is the typical case while not using AdMob in WebViewGold), please select these options.
If Apple rejects your app, please use Apple Resolution Center to explain the app feature in general (like "Our app enables our existing users to login in/use our products on their handheld device/....). If Apple still rejects your app, we can offer you a full refund of the WebViewGold license (by claiming within 14 days after purchase; see Terms and Conditions). Just contact us by mail.
Congrats on your own published iOS app! 🎉
No time or don't you feel like signing and uploading manually? Consider the appsubmitter.io service:
Of course, after the release should be celebrated first! But then perhaps the next project is already on the agenda? Our App Specialists are also happy to help you with individual development services for web apps, iOS apps, Android apps, chat bots, marketing ideas, and much more. Learn more
Credits / License / Upgrade to Extended License
Please don't forget to add your Envato/CodeCanyon Purchase Code in the purchasecode field for each app published by you. One license per each customized and published end product is required.
You will need an Envato/CodeCanyon Extended License if any of these cases apply:
- You charge your users for the App Store download
- In-App Purchases API or In-App Subscription API will be used in your app
- You sell your final app on any marketplace
If you already bought the Regular License, you can upgrade the existing license here. Alternatively, if you do not want to request a refund or upgrade the license, you can re-use your existing Regular License for another app covered by the Regular License.
All rights (e.g. of images) belong to their respective owners. The provider of this source code is OnlineAppCreator.com c/o jocapps GmbH - registered in Germany - and is not affiliated with Apple. IOS is a registered trademark of Cisco and used under license by Apple Inc. iPad, iPhone, iPod, Xcode, and Xcode logo are registered trademarks of Apple Inc.
One license per each customized end product is required. Please take a look for license info of your CodeCanyon purchase: https://codecanyon.net/licenses/standard
WebViewGold for iOS uses OneSignal-iOS-SDK (© 2017 OneSignal) which is licensed under a modified MIT License; you may not use this file except in compliance with the license.
WebViewGold for iOS uses SVProgressHUD (© 2011-2018 Sam Vermette, Tobias Tiemerding and contributors) which is licensed under the MIT License; you may not use this file except in compliance with the license.
WebViewGold for iOS uses firebase-ios-sdk (© 2020 Firebase) which is licensed under the Apache License, version 2.0; you may not use this file except in compliance with the license.
WebViewGold for iOS uses Google Mobile Ads SDK (© 2020 Google) which is licensed under the Google Developers Site Terms of Service; you may not use this file except in compliance with the license.
WebViewGold for iOS uses nanopb (© 2011 Petteri Aimonen) which is licensed under the zlib License; you may not use this file except in compliance with the license.
WebViewGold for iOS uses promises (© 2020 Google) which is licensed under the Apache License, version 2.0; you may not use this file except in compliance with the license.
WebViewGold for iOS uses protobuf (© 2020 Google) which is licensed under a Google License; you may not use this file except in compliance with the license.
WebViewGold for iOS uses SwiftQRCodeScanner (© 2017 vinodiOS) which is licensed under the MIT License; you may not use this file except in compliance with the license.
WebViewGold for iOS uses SwiftyStoreKit (© 2015-2016 Andrea Bizzotto) which is licensed under the MIT License; you may not use this file except in compliance with the license.
WebViewGold for iOS uses GIF-Swift (© https://iosdevcenters.blogspot.com/).
Rate WebViewGold
If you have 10 seconds, please rate WebViewGold (it is a great motivation for future updates ^^):
1. Go to CodeCanyon.net and sign in
2. Navigate to https://www.codecanyon.net/downloads
3. Click the stars, as shown in this picture:
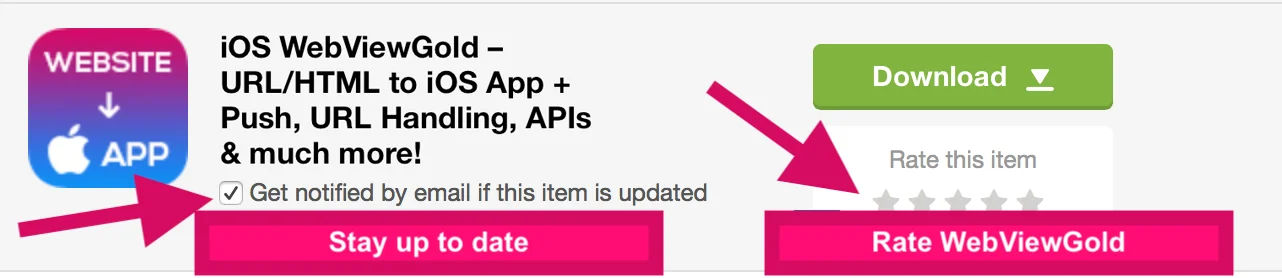
Thank you very much!
Get WebViewGold for Android
Get WebViewGold for macOS