Setting up your website/web app
Create a desktop-optimized website or web app and upload it to your webspace. WebViewGold for macOS supports classic HTML, PHP, WordPress, Progressive Web Apps, HTML5 games, Wix, Bubble, jQuery Mobile, and modern AI/no-code builders such as Lovable, Base44, and Bolt. A professional implementation workflow is to build your core product in jQuery, Lovable, Base44, Bolt, React, Vue, Angular, or another web stack, then use WebViewGold as the native Mac app container that adds Xcode packaging, native macOS window behavior, URL handling, file integrations, and app distribution options.
Optimize the experience like a real macOS desktop app: use responsive layouts for resizable windows, keyboard-friendly navigation, clear loading and error states, HTTPS endpoints, and concise fallback screens for offline or maintenance situations. For example, you may disallow user zooming if that matches your UI specification:
<meta name="viewport" content="width=device-width, user-scalable=no" />
SDK-style implementation example
Keep your website as the canonical source of business logic and expose small, documented JavaScript helpers for native-only actions. This keeps the same web application usable in browsers while WebViewGold for macOS provides the desktop shell. For SEO, keep route titles, meta descriptions, headings, and structured content on your public website indexable; for app users, let WebViewGold load those same routes inside a native Mac app experience.
Setting up WebViewGold for macOS Desktop apps
Xcode is required to set up apps using WebViewGold for macOS. Xcode is a powerful integrated development environment (IDE) that is used to create apps for Apple devices such as iPhones, iPads, and Macs. It's important to note that Xcode is a large program and can take up a significant amount of storage space on your Mac. Also, Xcode is only available for Macs and is not compatible with Windows or Linux. Here's a step-by-step guide on how to download and install Xcode on your Mac:- Click here: Download Xcode in Mac App Store
- Click on the "Get" or "Download" button to begin the download process.
- Once the download is complete, the Xcode installer will automatically launch.
- Follow the instructions in the installer to complete the installation process.
- Once the installation is complete, open Xcode from the Applications folder or from Spotlight search.
- The first time you open Xcode, you may be prompted to install additional components or agree to the terms and conditions. Follow the prompts to complete the setup process.
Follow these steps to disable this feature:
- Open Finder and go to the Applications folder.
- Locate the Xcode app and right-click on it.
- Select "Get Info" from the menu.
- In the Info window, uncheck the "Open with Rosetta" option.
- Close the Info window.
- Open Xcode and it should now run natively on your Mac's processor.
- Disabling "Open with Rosetta" may affect other Xcode projects (like WebViewGold for iOS) that rely on Rosetta, therefore, it's advisable to test your other projects (and undo the change) after making this change to ensure everything is functioning properly.
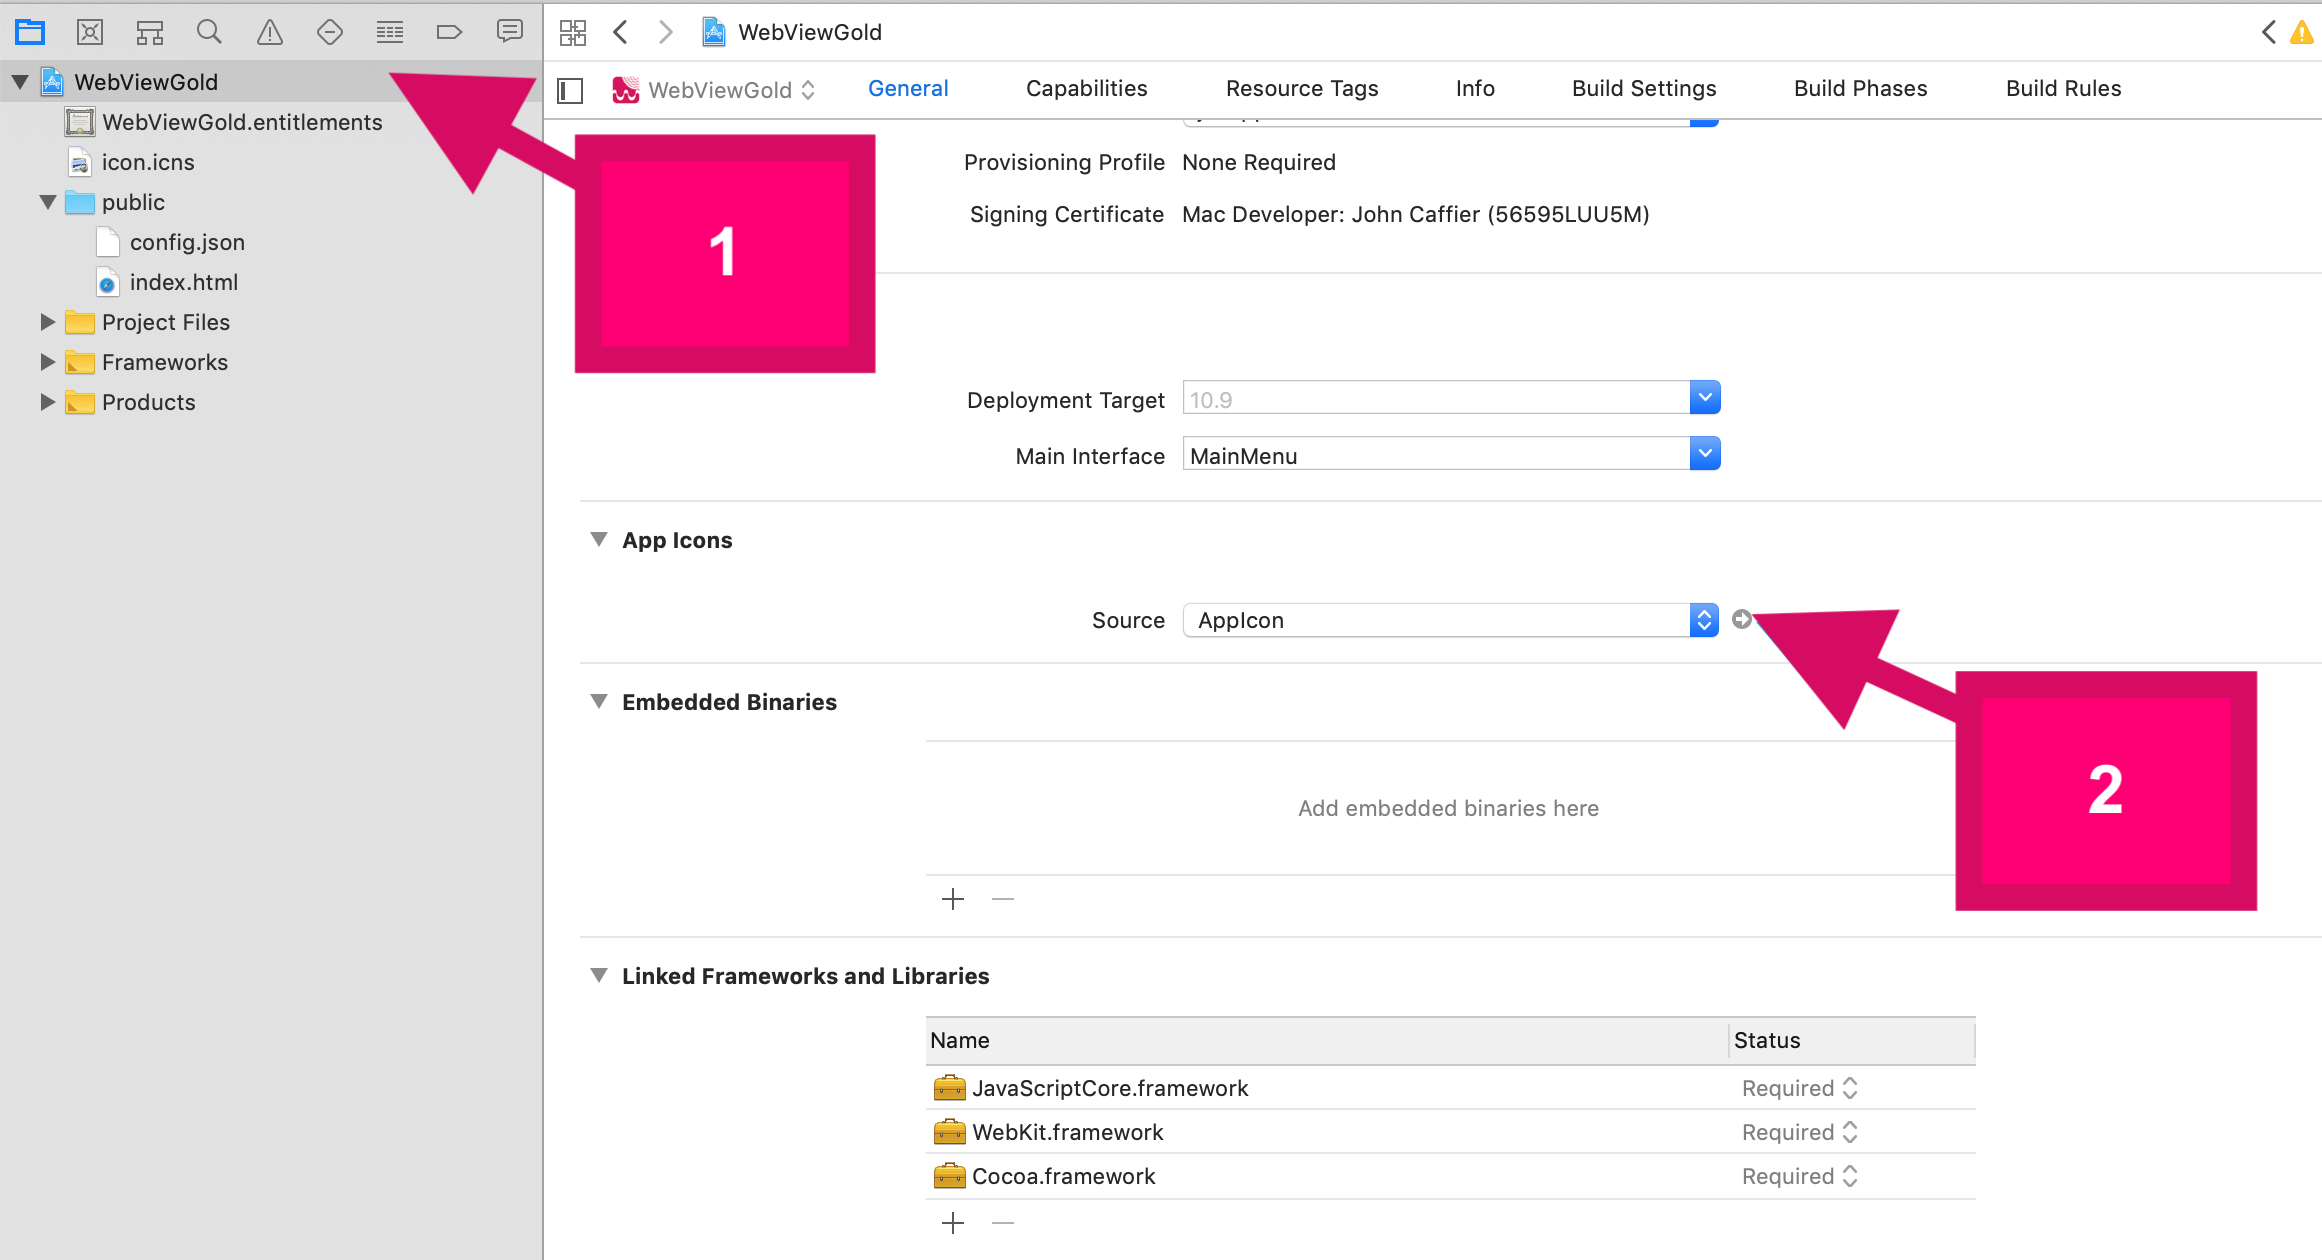
Choose the public folder and configure the config.json file: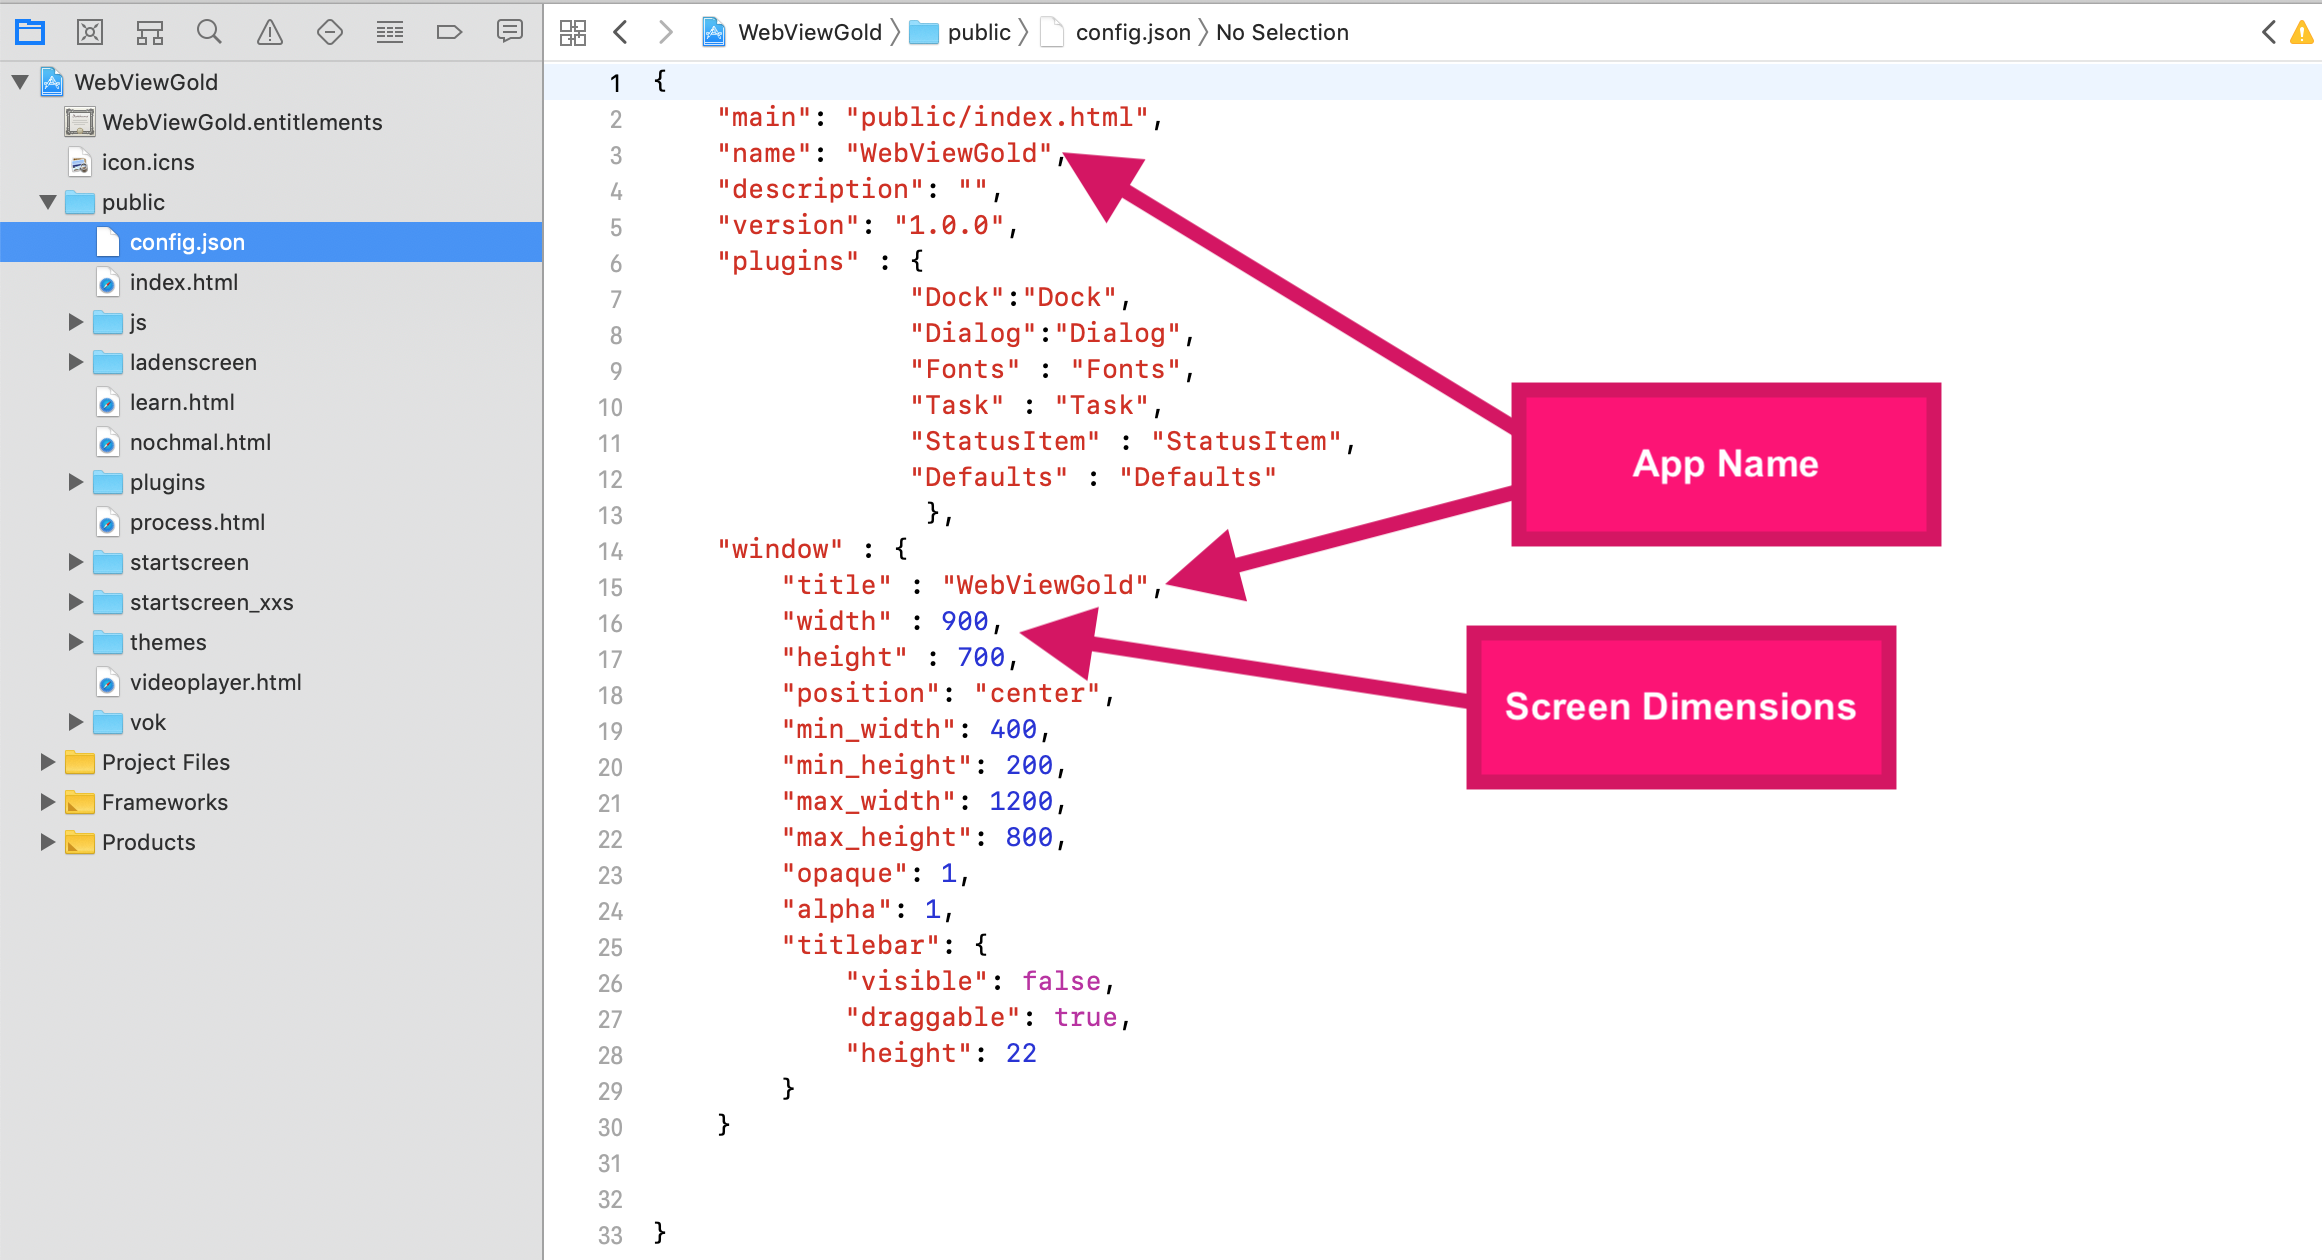
Open index.html file to edit the URL: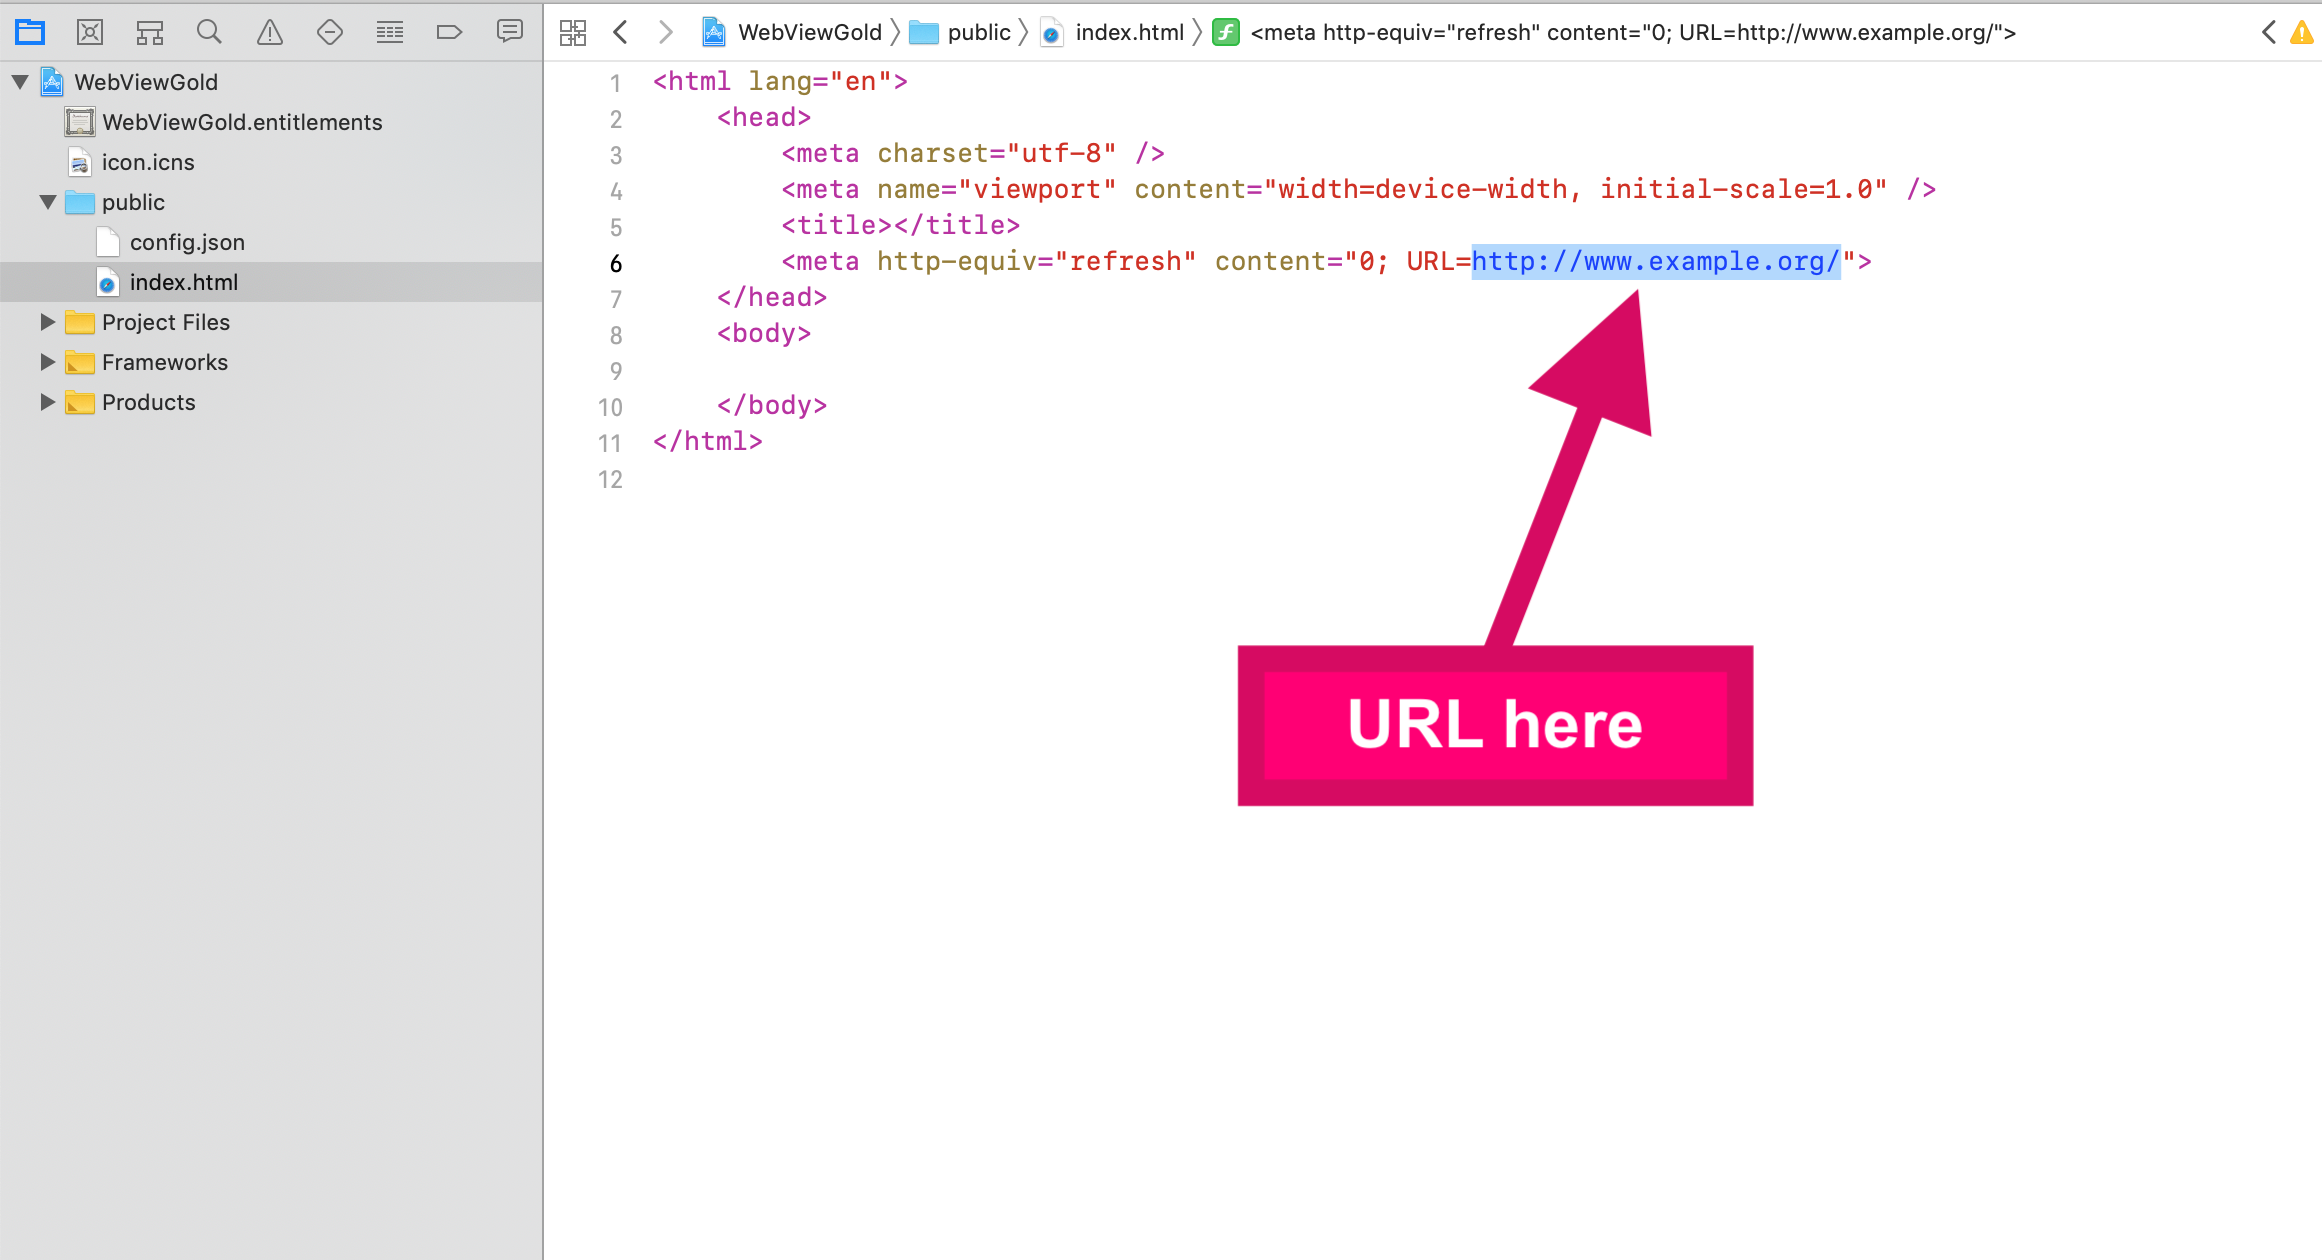
If you want to use local HTML content (instead of a remote URL), just replace the index.html file with your own content.
Change the app icon
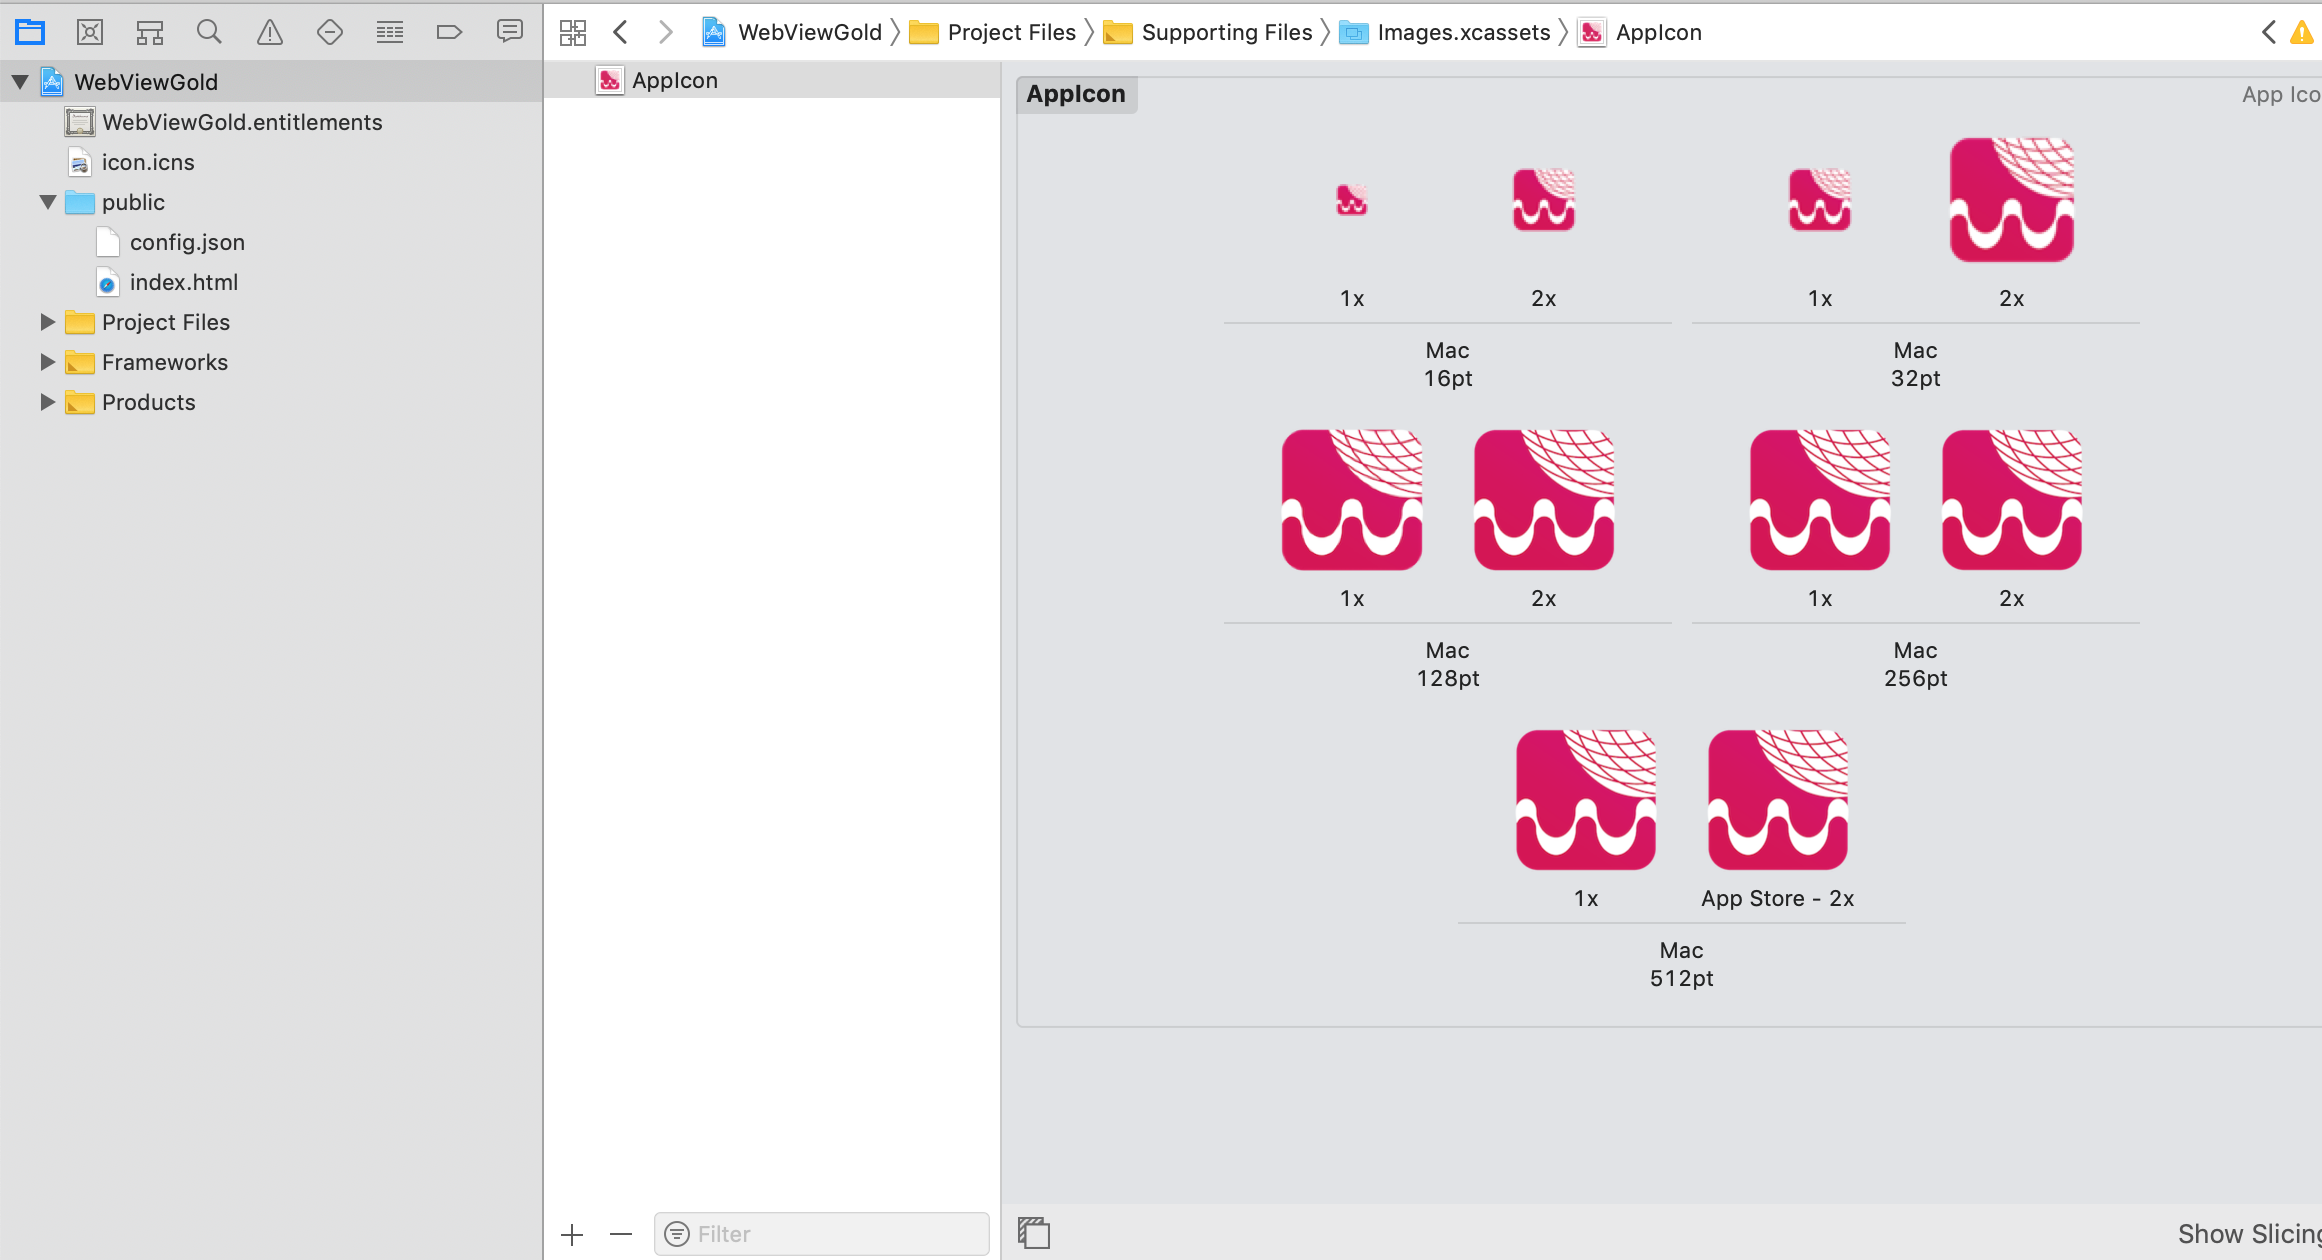
Just replace the included image files with your own resized image files. Alternatively, use this helpful tool: Asset Catalog Creator - App Icon, Image Set & Launch Screen Generator for iOS & OS X by Bridge Technologies Limited (we are not affiliated with the developer company).
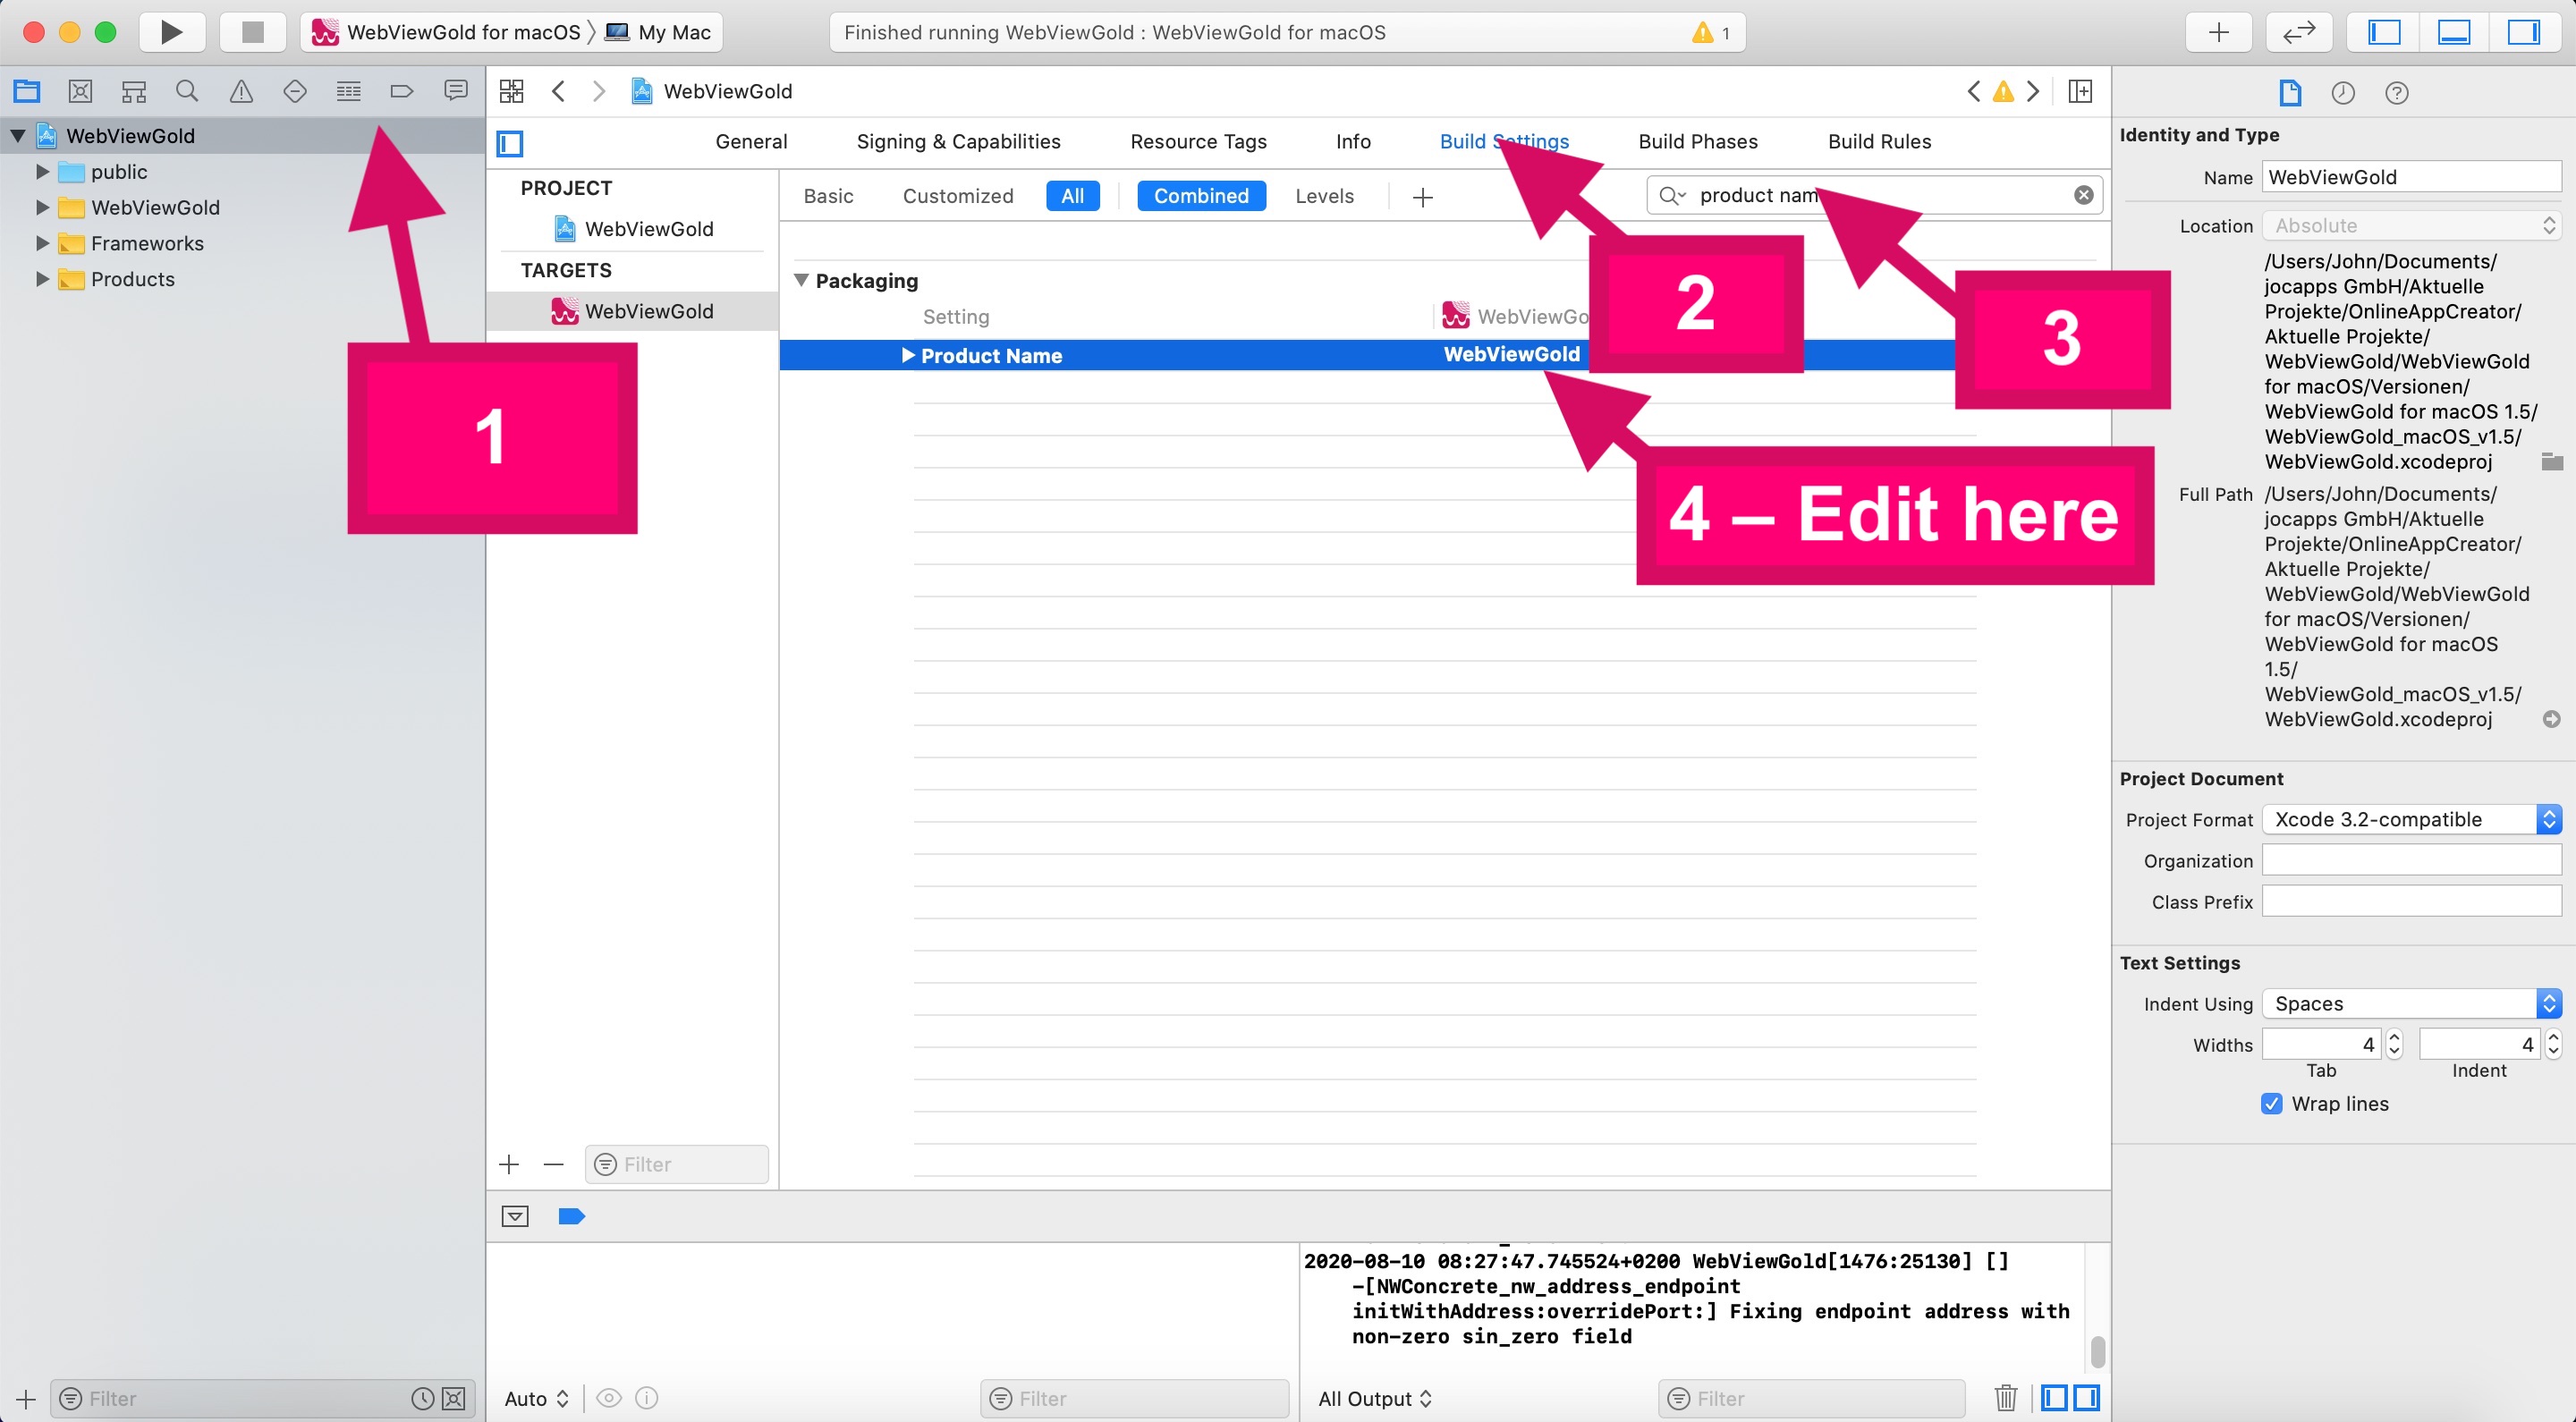
Change the application name
Optional) Change the Offline Screen text
Open the OfflineOverlay.xib file in Interface Builder subfolder. Afterward, double click on the text to edit the text: 
Optional) Change the First Run Dialog text
Open the FirstRunWindow.xib file in Interface Builder subfolder. Afterward, double click on the text to edit the text: 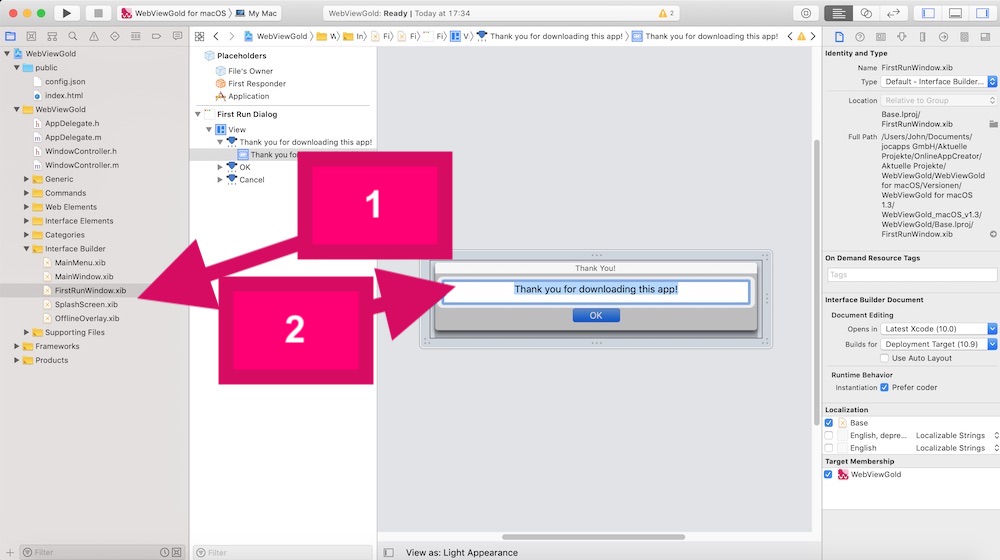
Optional) Change the Splash Screen text/ duration
Open the SplashScreen.xib file in Interface Builder subfolder. Afterward, double click on the text to edit the text: 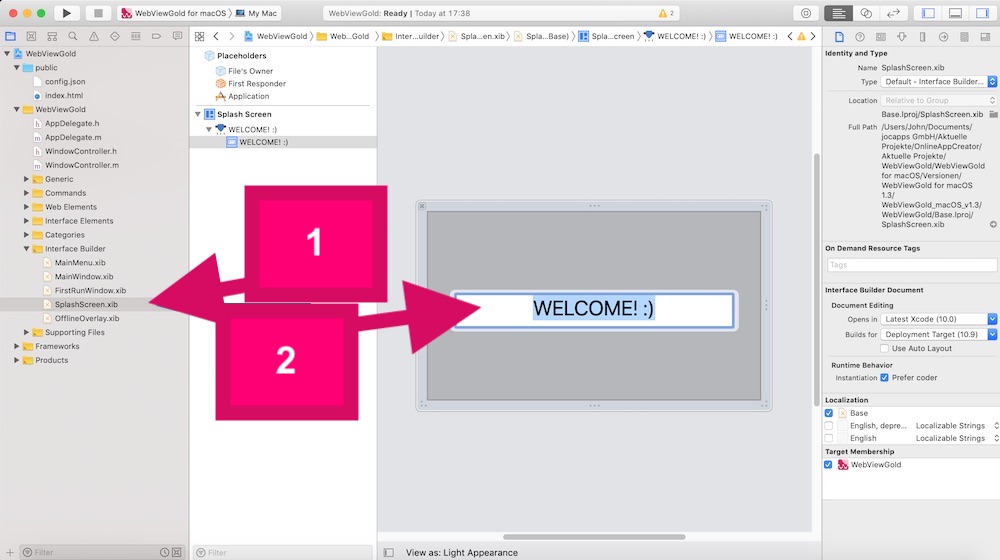
If you want to modify the maximum duration of the splash screen, open the Preferences.m file in Generic subfolder to change the timeout value (in seconds):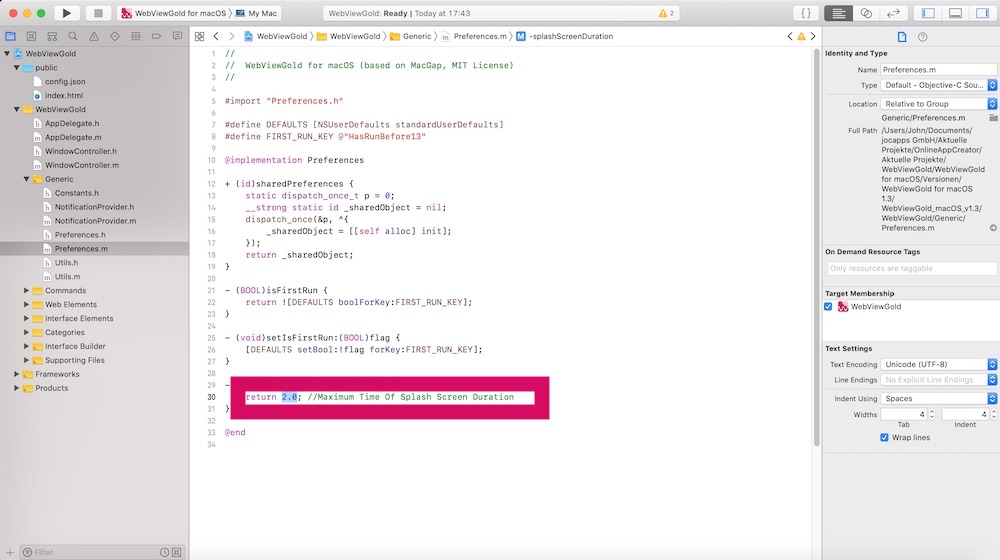
In-App Purchase & In-App Subscription API
Within some macOS/Mac apps, you can buy additional content or services. These kinds of purchases are called "in-app purchases". They can be an attractive source of revenue for developers and are very convenient for customers as they use existing accounts and payment sources for settlement. WebViewGold allows triggering Mac App Store In-App Purchases. Just add your In-App Purchase Product ID (obtained from App Store Connect) in the Constants.h file: 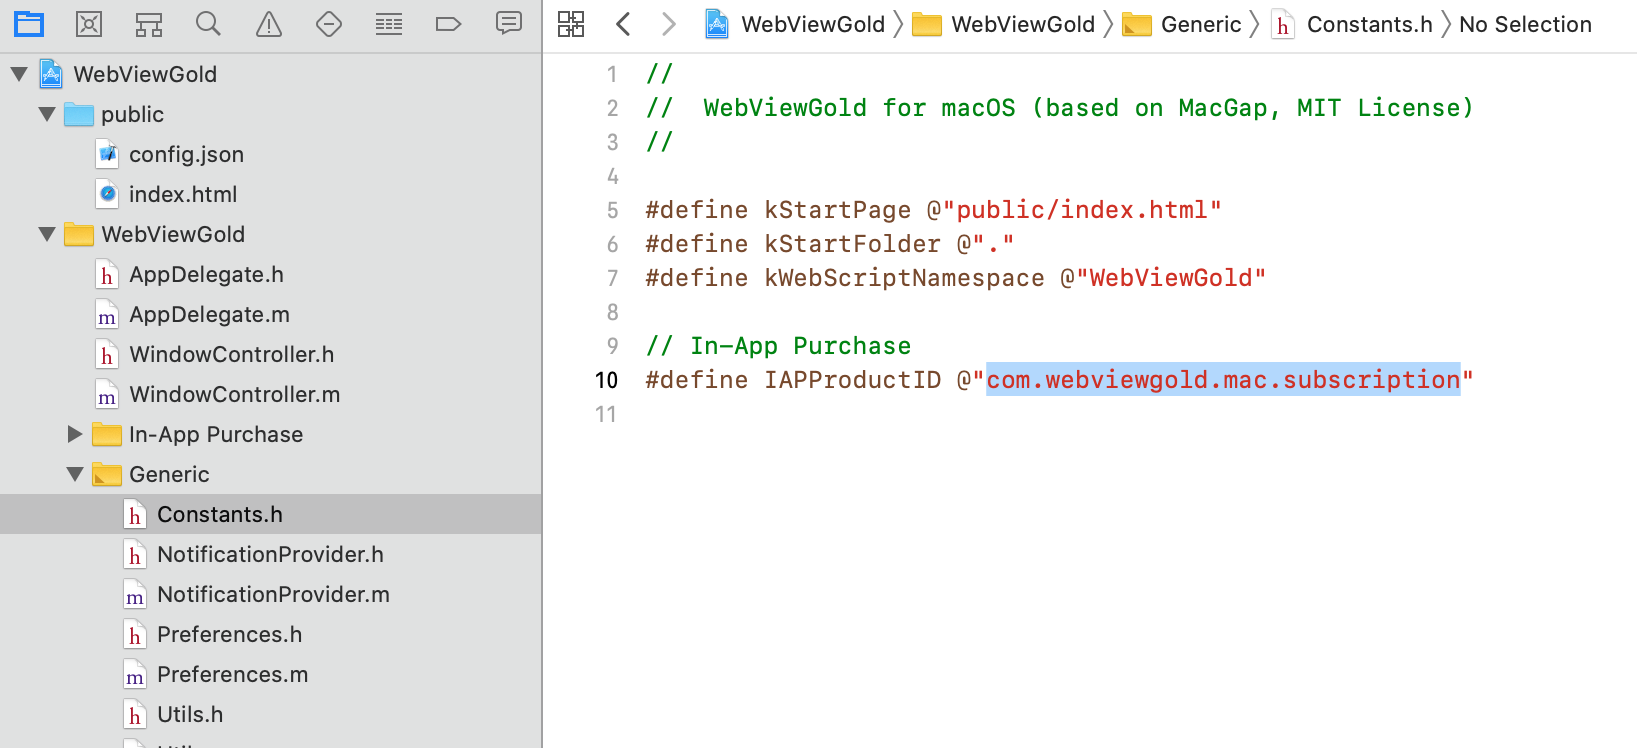
Afterward, just link to this kind of URL:
<a href="inapppurchase://?successful_url=https://www.google.com">Buy In-App Purchase</a>
Alternatively, use this kind of URL for subscription products:
<a href="inappsubscription://?successful_url=https://www.google.com&expired_url=https://www.yahoo.com">Start In-App Subscription</a>
In this URL example, https://www.google.com should be called after the successful subscription activation, and https://www.yahoo.com should be called as soon as the subscription is expired.
UUID API
WebViewGold allows passing a non-personal, unique device ID (UUID / "Universally Unique Identifier") to JavaScript, which can be used to identify macOS devices uniquely. This API can be useful, for example, to save settings or values on the server-side and restore them on the client-side. Please respect local and international privacy regulations if you use this API.
<a href="get-uuid://">Get UDID</a>
<a href="#" onClick="alert(uuid);">Show UDID</a>
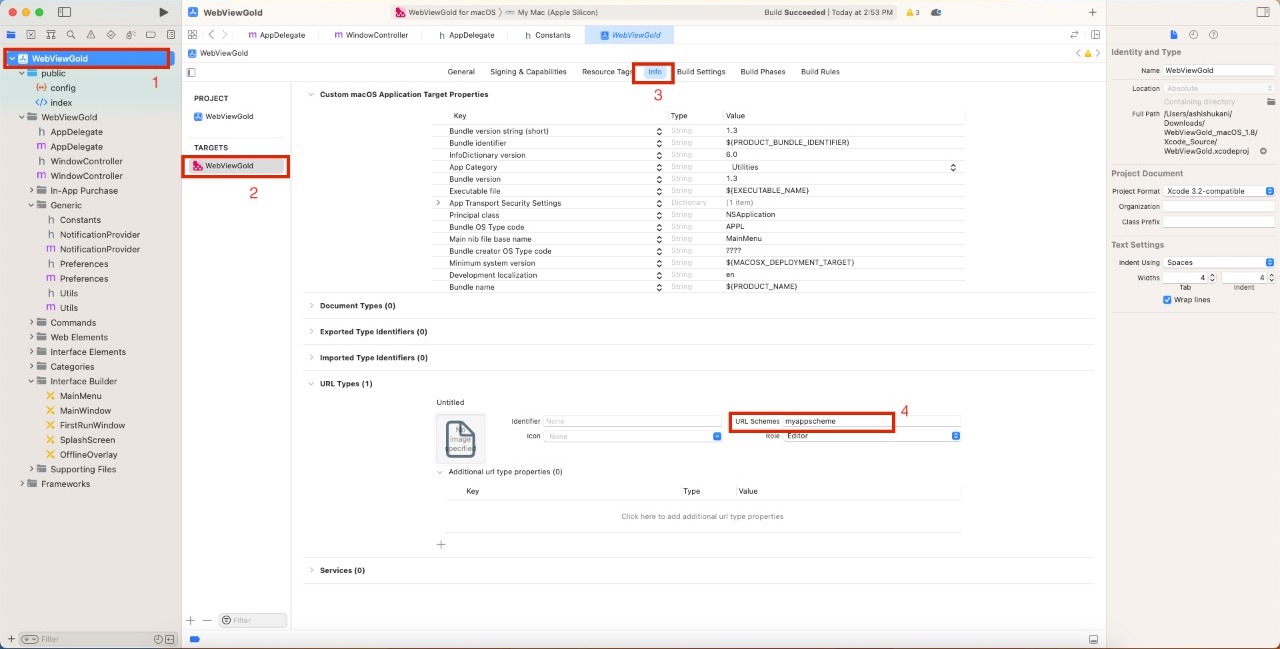
Deeplinking API
Deeplinking ("Custom URL Scheme") is a powerful approach that allows users to navigate to a specific page or section of an app directly from an external source such as a website, email, or another app. In the context of the macOS app template from WebViewGold, deeplinking allows developers to create links that launch the app and take users to a specific page within the app.
The process of implementing deeplinking in the WebViewGold for macOS app template is relatively simple. Here's how it works:
Credits / License
All rights (e.g. of images) belong to their respective owners. The provider of this source code is OnlineAppCreator.com c/o jocapps GmbH - registered in Germany - and is not affiliated with Apple. iOS is a registered trademark of Cisco and used under license by Apple Inc. iPad, iPhone, iPod, Xcode, and Xcode logo are registered trademarks of Apple Inc. WebViewGold for Mac is based on MacGap (licensed under MIT license).
Please take a look for license info of your CodeCanyon purchase: https://codecanyon.net/licenses/terms/tools
Rate WebViewGold
If you have 10 seconds, please rate WebViewGold (it's a great motivation for future updates ^^):
1. Go to CodeCanyon.net and sign in
2. Navigate to https://www.codecanyon.net/downloads
3. Click the stars, as shown in this picture:
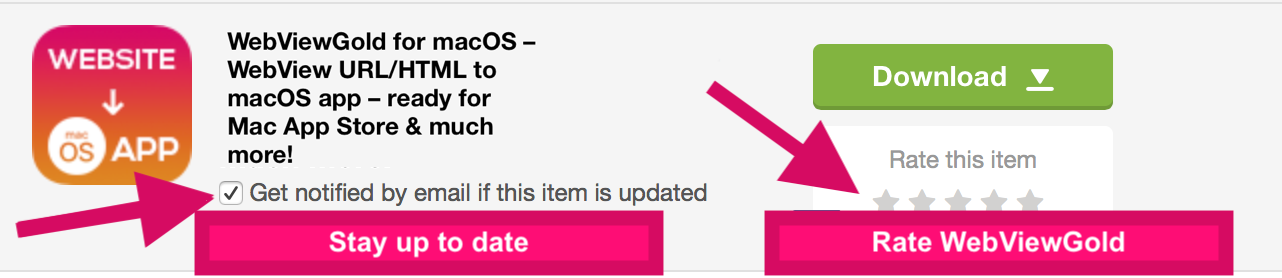
Thank you very much!
WebViewGold for iOS & Android
photos2webgallery for macOS