
App Name, Icon & Splash Screen
Rename your iOS app, add a custom app icon, and set up personalized splash screen graphics for your WebViewGold app.
Changing the Displayed App Name:
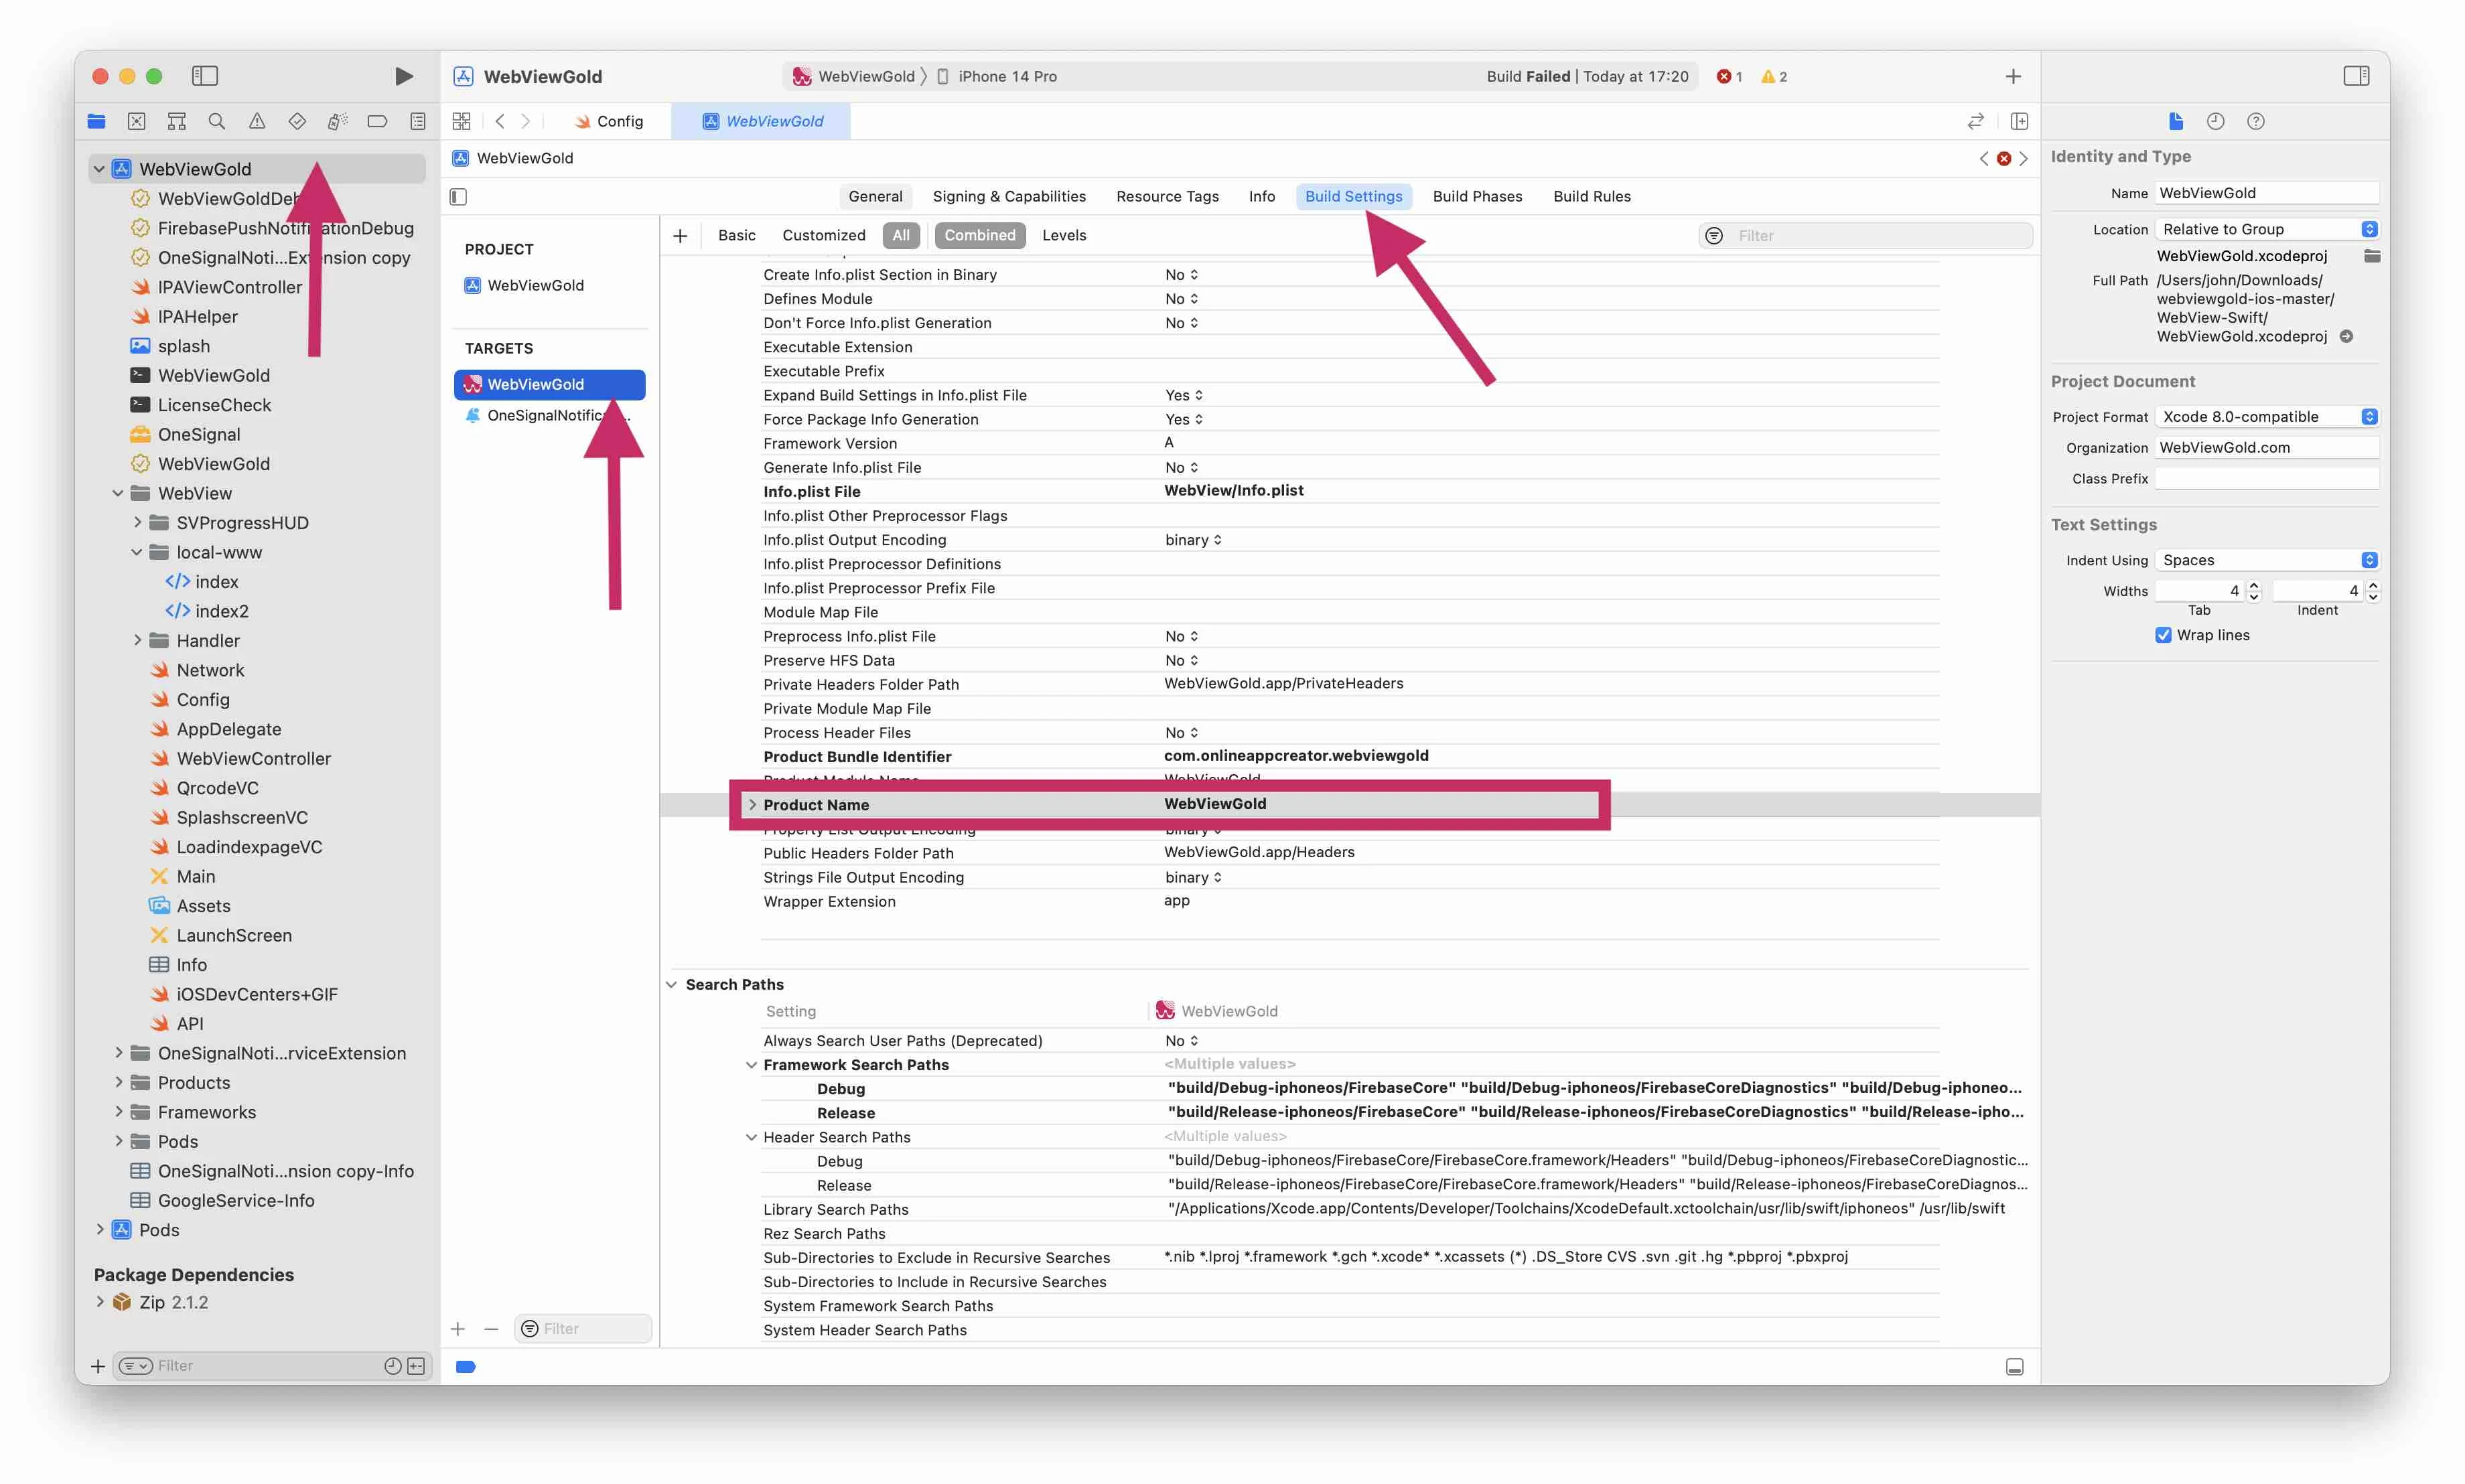
Navigate as shown in the screenshot via WebViewGold → WebViewGold → Build Settings to Product Name and change the name as shown in the screenshot below:NOTE: If your app name contains accent letters (like 'à', for example), you will need to replace them with normal letters for the Product Name. The Product Name is also used for naming files in your app, so it does not support accent letters (the app will crash). Then, to ensure that your app displays the correct name to users on the iOS homescreen, please also change the Bundle Display Name (located in the Info.plist file) from "$PRODUCT_NAME" to your app name with accent letters. For example, if your app name is "WebViewGold", the Product Name should be "WebViewGolda" and the Bundle Display Name should be "WebViewGold".
Adding a Custom App Icon:
Follow these easy steps to add a custom app icon to your WebView-based iOS app:1. Locate App Icon Settings
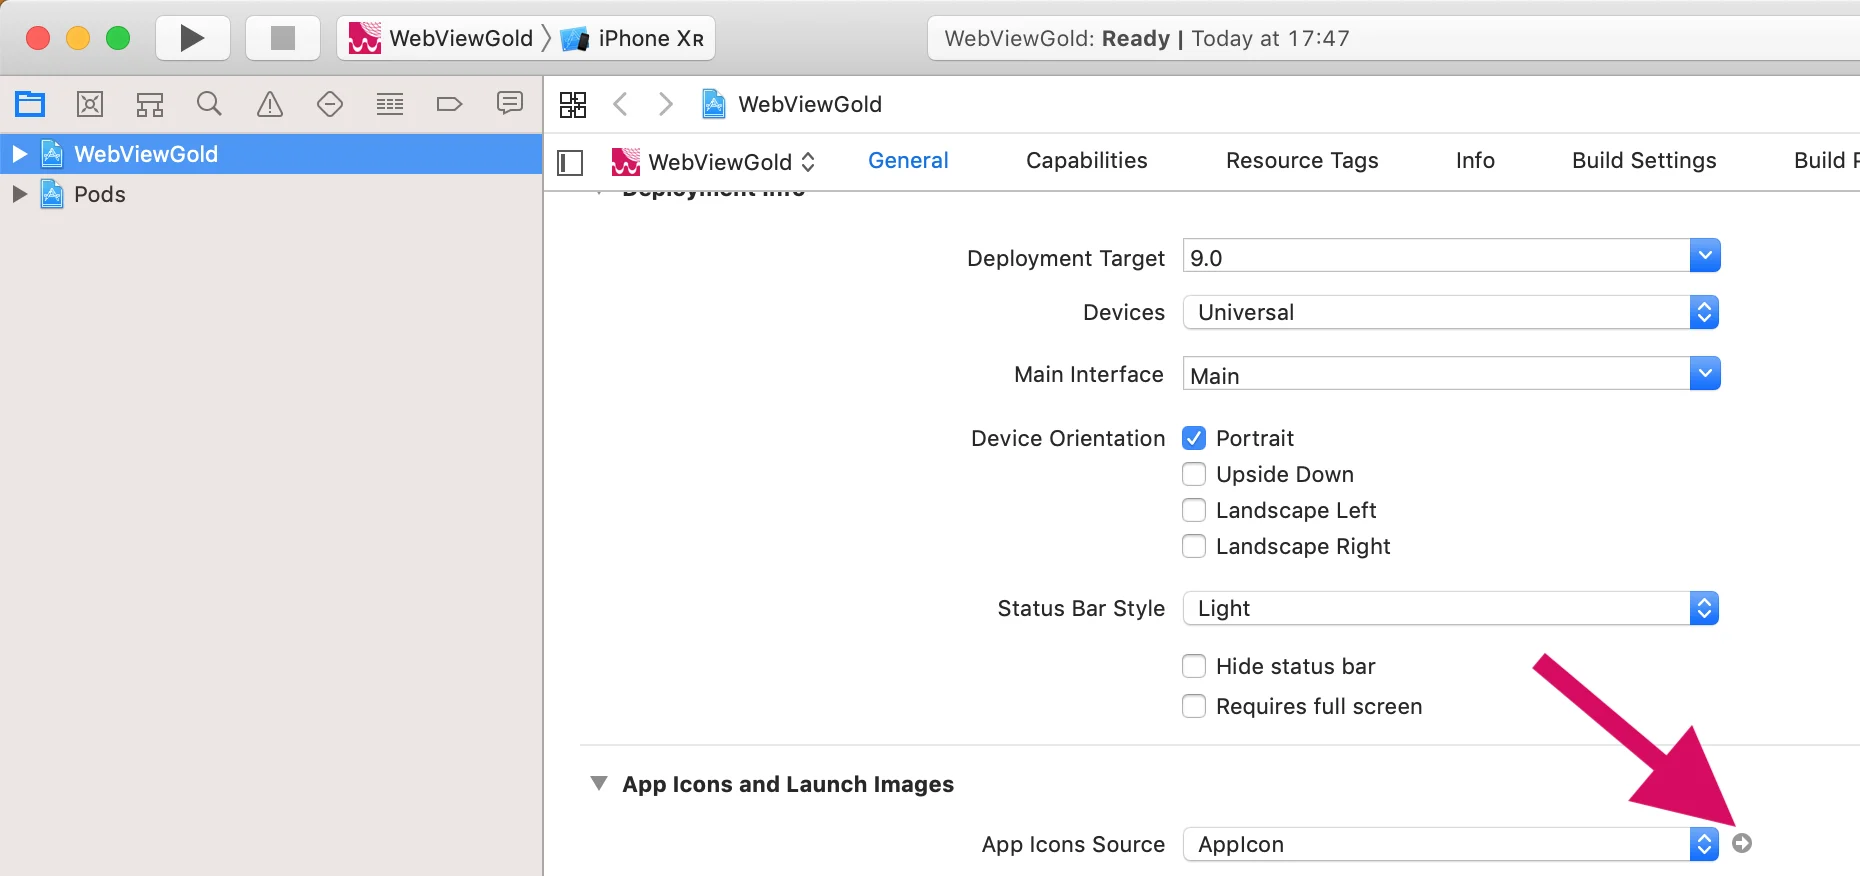
Navigate to WebViewGold → WebViewGold → General → App Icons and Launch Screen → App Icon Source.
2. Replace with Your Icon
Just replace the included image files with your own resized image files. There are free tools online to help generate these different image sizes like App Icon Generator, for example (we are not affiliated with the developer company). Alternatively, you can search for any "iOS App Icon Generator" tool you like.
Adding a Custom Splash Screen:
Follow these steps to add custom splash screen graphics to your WebView-based iOS app:1. Enable the Splash Screen
To activate the splash screen for your app:
- Open the Config.swift file and search for
splashScreenEnabled. - Make sure this variable is set to
true.
2. Replace the Splash Screen Image
To use your own branding as the splash screen:
- Replace the existing splash.gif file in the main folder of the XCode project with your own GIF file.
- Important: Ensure your image file is square (width = height) for optimal display. For example:
- 128x128 px
- 512x512 px
- 1024x1024 px
3. Adjust the Display Timeout
To control how long the splash screen appears:
- Open the Config.swift file and search for
splashTimeout. - Modify the timeout setting to your desired duration (in milliseconds).
Example: Set to 2000 for a 2-second display.
Set the remainSplashOption option (can be found in Config.swift file) to true if you want to display the Splash Screen until your page was loaded successfully. Otherwise, it will be displayed for a short time only, and the native iOS loading indicator will begin.
Use the splashscreencolor option (can be found in Config.swift file) to modify the background color of the splash screen. Color options can be found here.
4. Optional App Disclosure for your Privacy Policy / Terms & Conditions
If you offer (WebViewGold-based) mobile apps to your users, you may optionally include the following statement in your Privacy Policy or Terms & Conditions (this note is provided for informational purposes only and does not constitute legal advice. We assume no liability for how this text is used. Please consult a legal professional for individual guidance):
    Our mobile apps (iOS/Android) are developed using WebViewGold by jocapps GmbH (Germany). These apps display the content of our website using a WebView framework and enrich it with selected native features to improve usability and performance. Accordingly, the same privacy policy and terms of service that apply to our website also apply to our mobile apps. For more information, please visit
    https://www.webviewgold.com/#convert-website-to-app-privacy, or contact us directly.